A few weeks ago, we brought the ladder to the fly bridge home with the goal of refinishing it. We had previously disassembled it set aside all of the hardware.
One evening last week, we sanded the flat portions of both sides of each step with a palm sander. Today, we completed hand-sanding the rounded edges and the grooves that were milled into the top of each step. With the steps prepared, we lined them up on our basement workbench and applied the first of what will be five coats of Sikkens Cetol Marine Light. We refinished the bridge steps in a similar way on Mad Dog, our 32 ft. Chris Craft Sea Skiff, and after three seasons of heavy traffic, the Sikkens looked as good as new.
While it is a time-consuming process to apply five coats to each side, it appears that we can get one coat on each side, each day. If that works out, we'll be ready to reassemble the ladder in about a week.
About the time the turkey went into the oven, we cleaned the stainless brackets that hold each step in place and added a coat of good quality wax to each one.
We also had the shelf from under the vanity home for rehab. We had removed it to gain access to the area behind the vanity so we could run hoses to the new toilet. The shelf was pretty nasty.
We disassembled the teak trim, sanded the 30-year old stains off each piece and sanded and repainted the shelf itself, a piece of 1/2-inch, 6-ply marine plywood, that was as true as the day Silverton made it, despite having cleaning supplies and other bathroom junk piled on it for more than 30 years.
We set the shelf on our secondary refinishing station, also known as the dryer, and applied a coat of the same paint that we used last year on our deck.
We made some room for the teak trim pieces that surround the shelf so that we could apply Sikkens to everything at one time. Three coats for the shelf trim should be plenty.
Sunday... the day after Christmas
The weather looked bad here with snow approaching but we ventured down to Portland to see what we could get done, anyway. Our electric heater in the boat took a while to get the cabin up to 40 degrees and we slid the car into the shed to keep the snow off it until we were ready to go.
We began by mounting the new Rule SuperSwitch bilge pump float switch just forward of where the old one was located. Then we screwed down the mounting plate for the new Johnson bilge pump. Interestingly, the hole centers for the Johnson pump mounting plate were exactly the same as the ones for the old Rule bilge pump. That saved drilling more holes in the fiberglass in the bilge. We snapped the switch in place and then did the same for new Johnson pump.
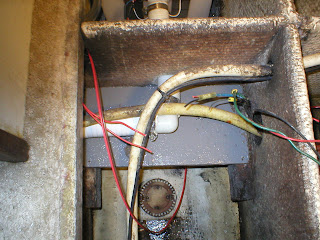
Now it was time to figure out the rat's nest of old wiring that ran the old bilge pump. There were numerous butt connectors and splices and we cut all of those out. Using a test light, we determined what wires were used for manually operating the pump or allowing it to activate via the float switch. We've decided to rehab the wiring connections in that area, now that we know what's going on. No sense in doing things half-way.
At that point, the the snow was beginning to blow and we decided to leave and get home while we could.


