Sunday, January 27, 2013

Williamstown weekend


Every other winter, we drive to Williamstown, Mass to visit The Clark (actually named The Sterling and Francine Clark Institute of Art but known to just about everyone as just "The Clark").  It's really a fun weekend for us because we love The Clark and enjoy poking about Williamstown. This year, we picked a very cold weekend, just about as cold as we can remember it being in in a long time (just enough colder than Hartford to make it worthwhile).

On our first trip eight years ago, we stayed at the Williamstown Inn. It's right on the green and looks good from the outside but we found it expensive and noisy. Since then, we picked a motel from memory or through an Internet search. This year we booked an overnight through Priceline at the Willows Motel for just $65.  This place doesn't look like much in the dead of winter, but was it clean, warm and very comfortable. There appeared to be just one other guest beside us. If some of you are long time readers of our blog, you  may remember an entry a few years ago about another motel.  The first question I always ask (this is FH speaking) is where is the ice machine.  We were told at that place that they did not have any.  Since we always go in the dead of winter, maybe they assume we will harvest ice cycles. We were told at that time, if we needed ice for our medications, we could come down to the office.  Well, this year we were advised to go across the street to the Cumberland Farms and purchase a bag of ice for 99 cent.Too funny...


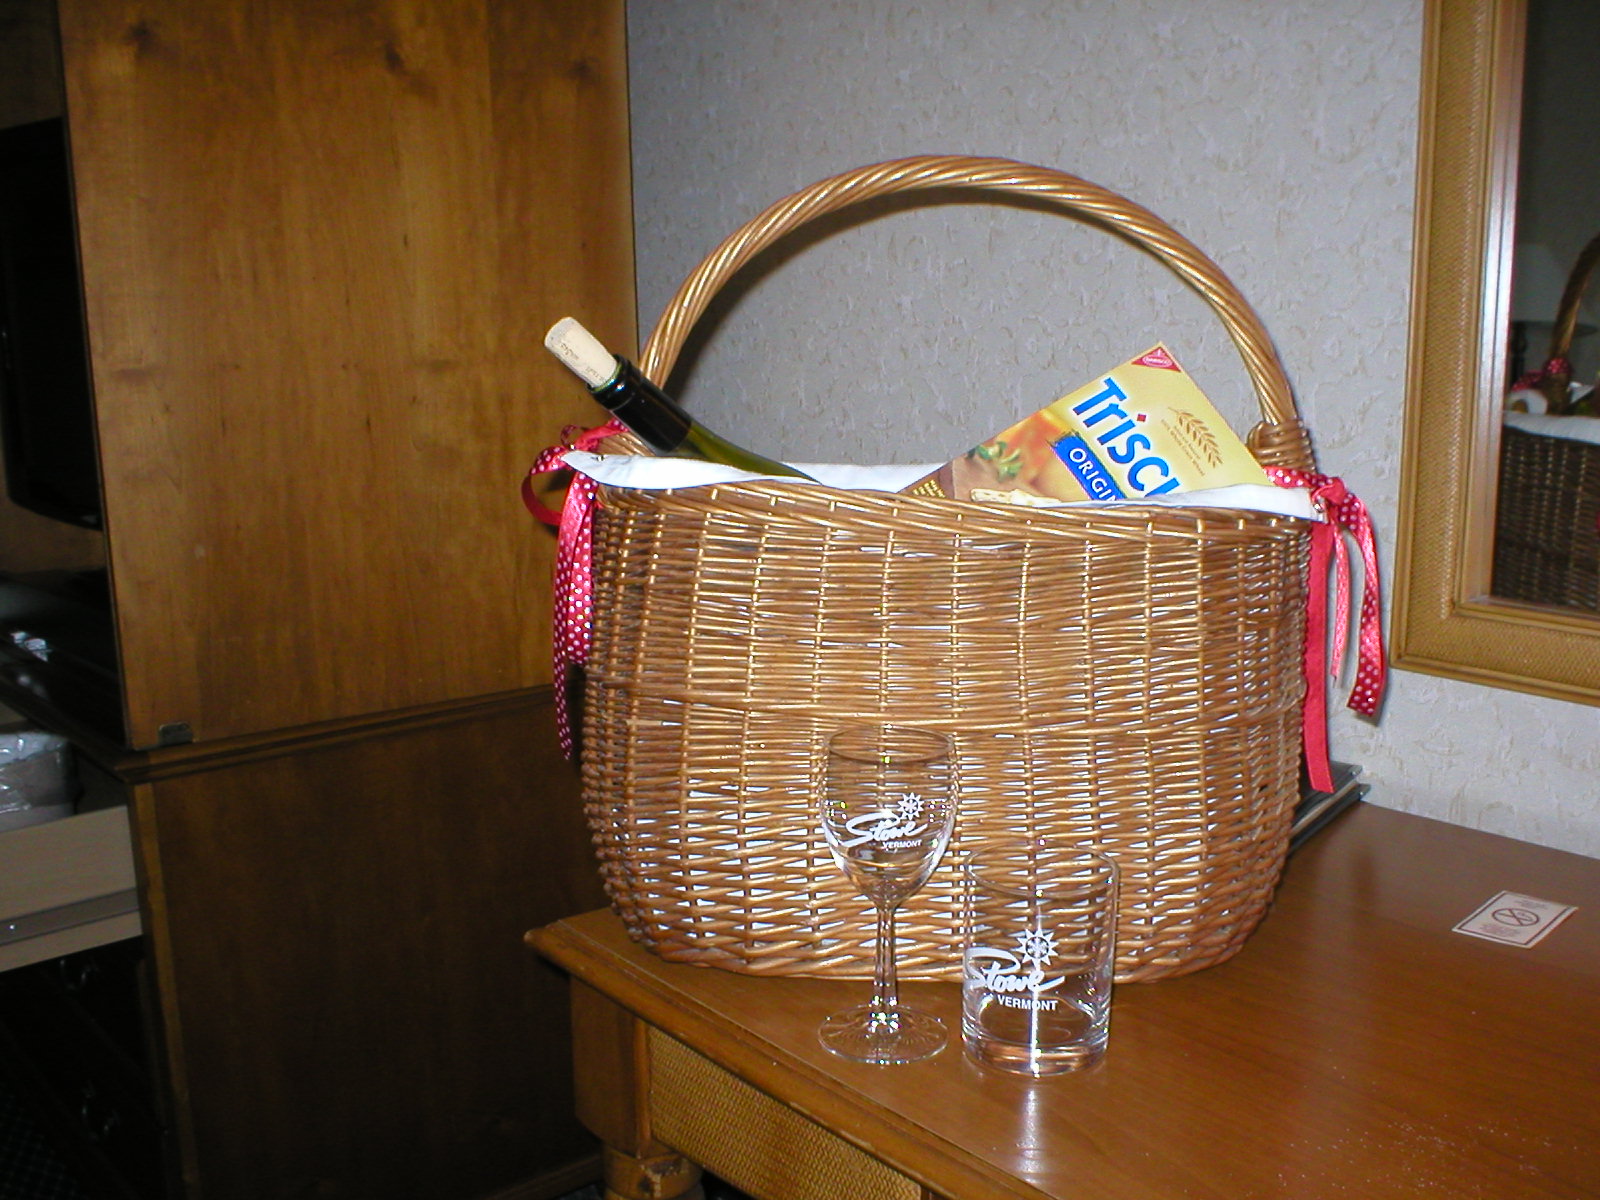
We stopped at The Clark just to see what their Sunday hours were and then drove into North Adams, right down the road. Not much going on there except we did notice a dozen or so big new wind generators on the top of the mountain.  Then we unloaded our stuff at the Willows and broke out Frances' always-welcome picnic basket: vodka, wine, orange juice, cheese, crackers, special glasses from Stowe, napkins and utensils. We were many miles from the nearest boat but cocktail hour simply had to go on.

Frances fired up her little computer and we picked a place to have dinner. One of the docents at The Clark had recommended a place called Hobson & Choice that was located nearby. We booked a table and headed out into the cold. God, was it cold!

Dinner at Hobson's Choice was excellent as was the service.  Even better, it wasn't crowded, probably because Williams College students were on winter break.  It was very homey and populated by locals and
beautifully age knotty pine every where.

On Sunday morning, Bill headed out to a nearby Dunkin Donuts for two coffees while Frances took a shower. On return, Bill set the parking brake on our reliable old Mercury and snapped the frozen parking brake cable. No big deal but it was that cold!

Finding a place to have breakfast also took some computer assistance but we did locate the Chef's Hat that was apparently on Route 7.  We called them for an exact location but they sent us in the wrong direction. We eventually found the place and had a good breakfast although, note for next time, don't sit near a window. Also note the very good home made hash. Just excellent. And it was another knotty pine lined local hangout.

After breakfast, we drove over to The Clark. Much of the facility is closed while they do a major expansion. Frances took pictures of the construction. The plan is to have this finished in mid-2014, so we'll have to come back again then.


The Clark has several fascinating audio-visual presentations that describe the benefits of the new construction.


Even during construction, The Clark is still well worth a visit. One gallery contains some of the The Clark's most famous paintings. That room also offered a way for us to virtually arrange some of these great paintings within the room. The software is called "UCurate" and as we arranged the paintings via computer, we learned that we could download the software and play again at home.

Here's what our gallery looked like. Yes, we arranged all those works. It was really fun.If you are an art nerd and would like to create your own gallery, go to www.clarkart.edu and find clark remix...it's pretty intuitive, but will require that you down load their veiwer-seems harmless.  You can change the gallery's color of the walls and then add pictures and other artwork.  I would like to send a screen shot story of what to do, but have run out of time...enjoy (FH)


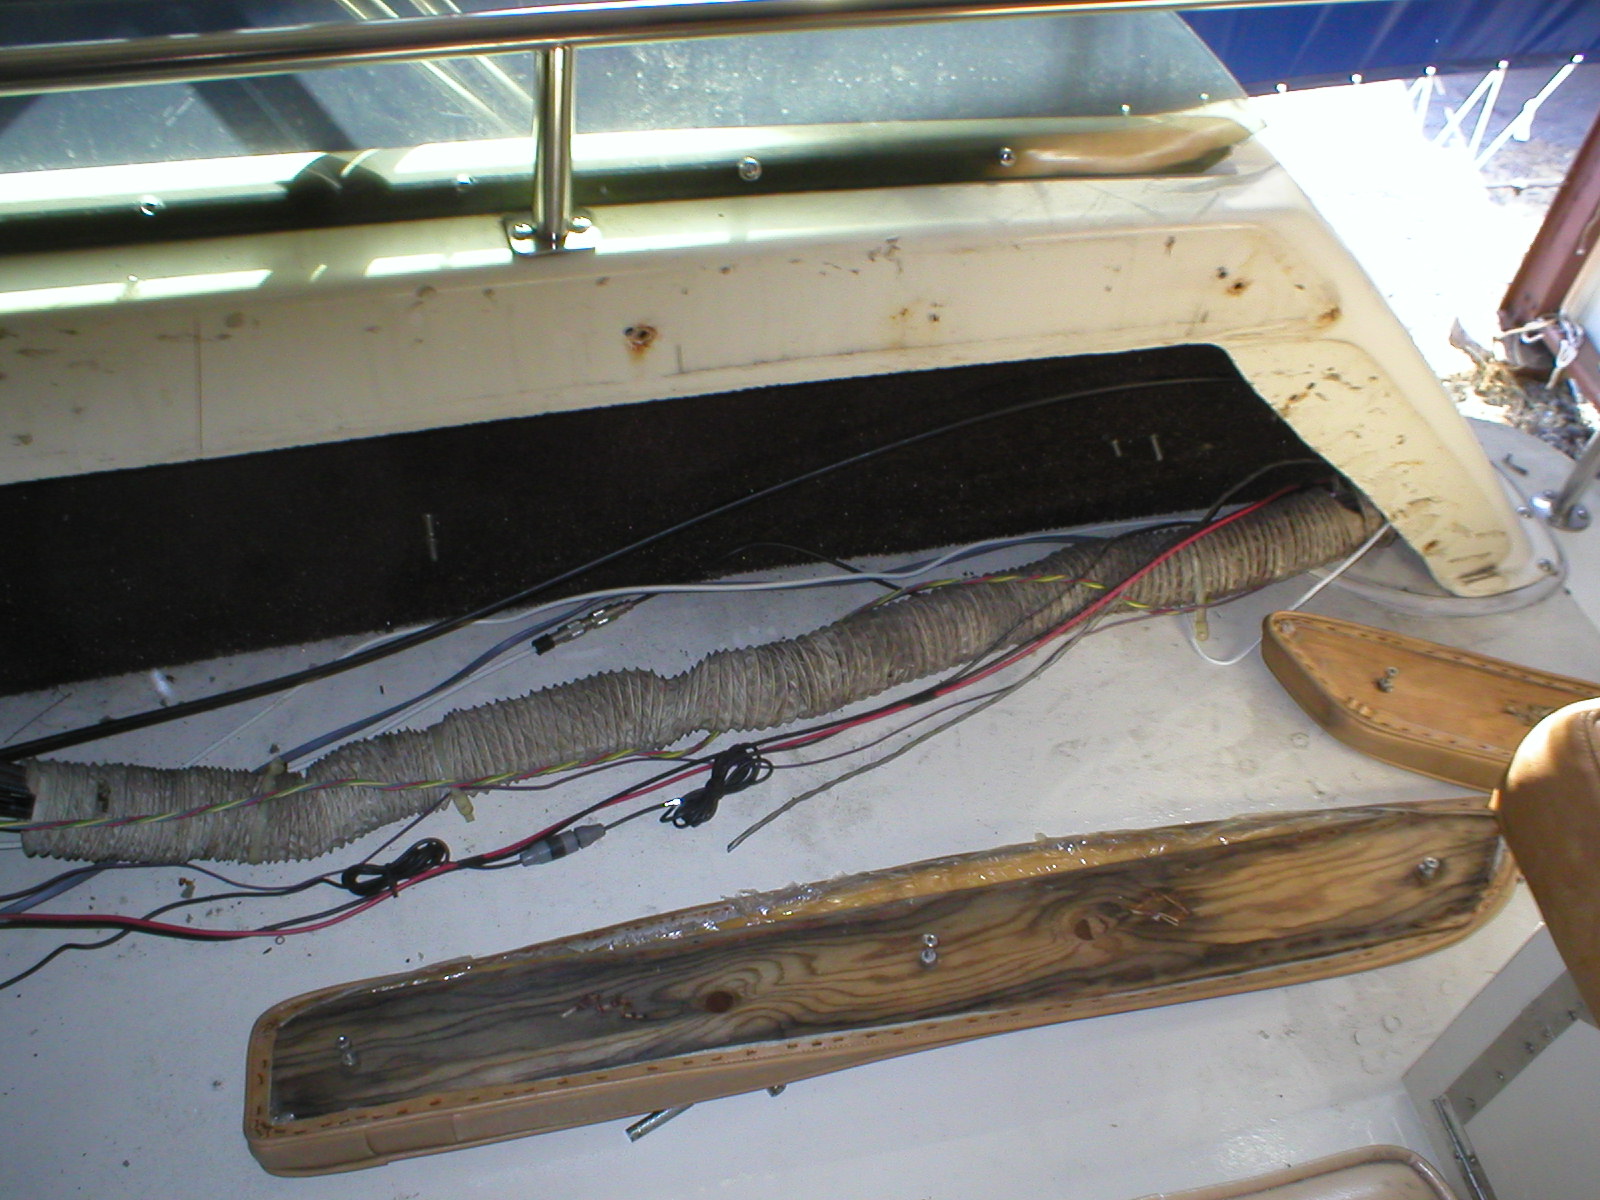
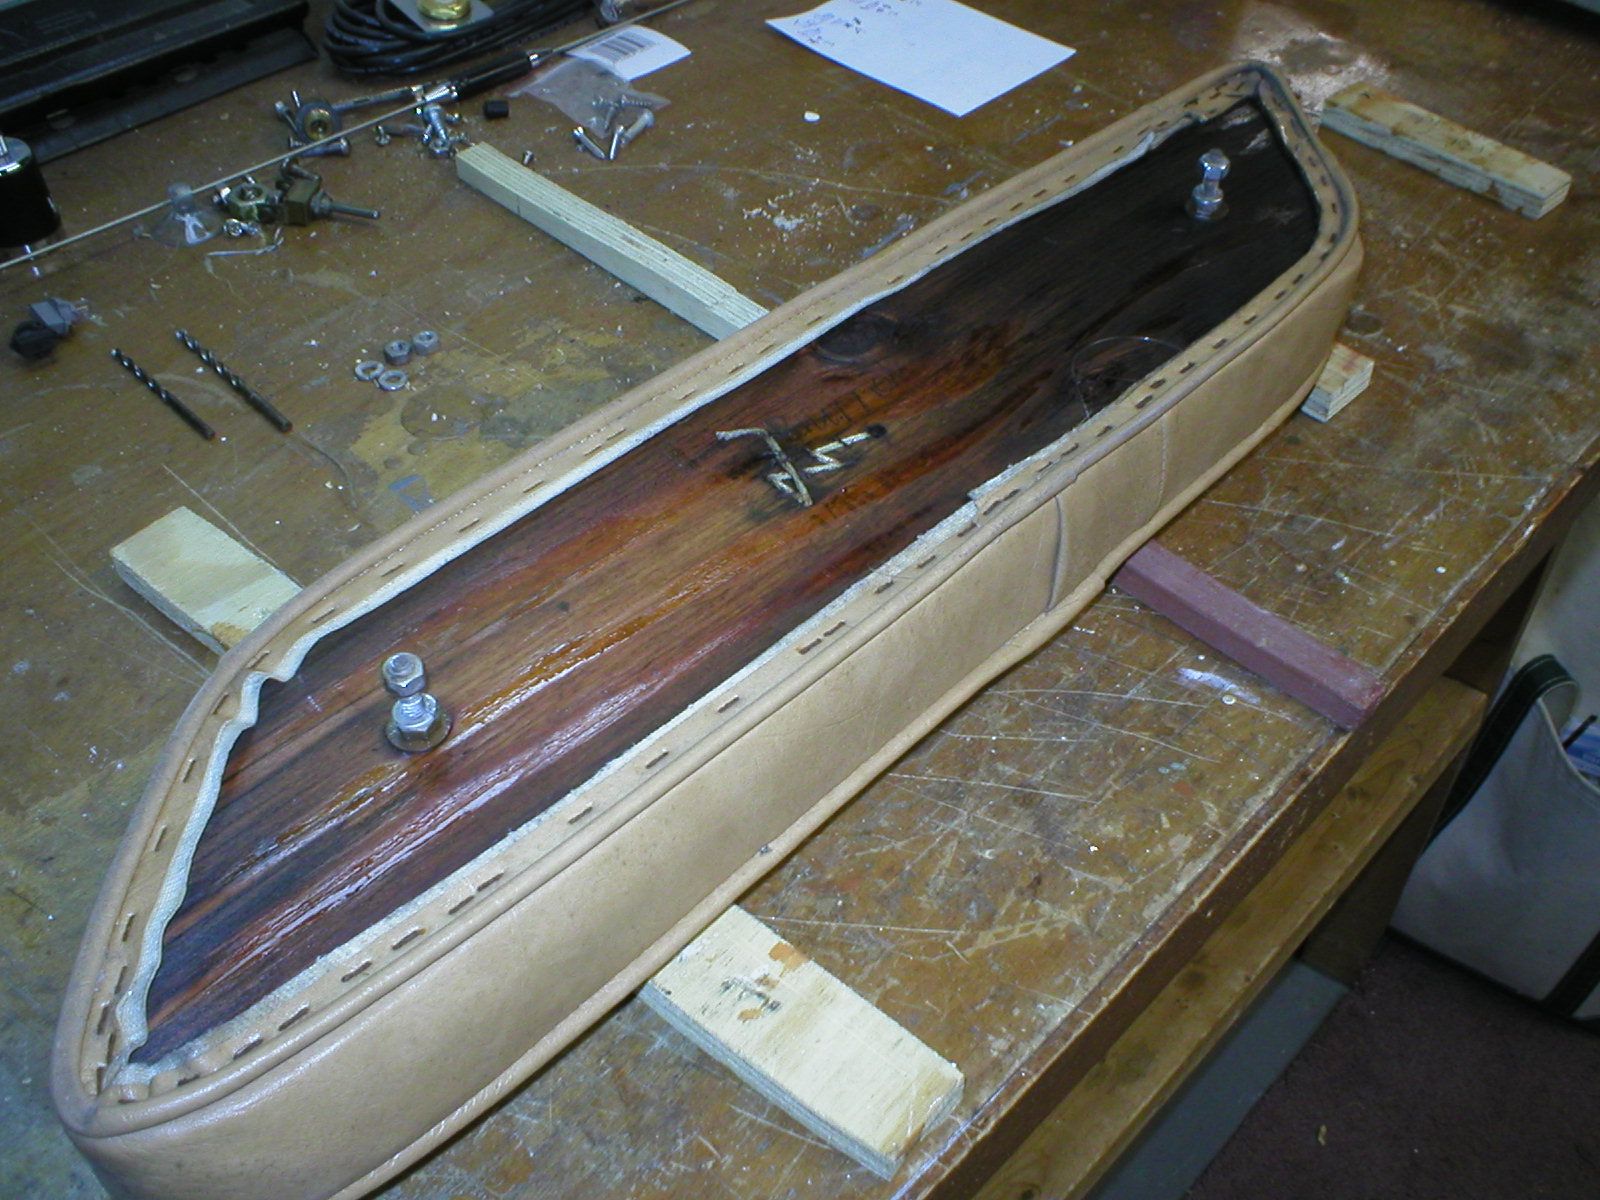
Back to boat work next weekend.

Friday, January 25, 2013

Fly bridge bolsters finished

As we mentioned previously, we removed the Naugahyde bolsters that run along the top of the starboard side of the bridge to get more access to the space below where we are going to install new control cables. This is what it looked like when we first got them off.

After taking these things off, we cleaned all the rust and grime off the fiberglass and waxed it. We know. No one's ever going to see it after the bolsters are remounted but we like to know that it was done right.

The long section shown at the bottom of the photo had burst along one side. All of the little steel staples had rusted away.

As we said in the last blog post, we also removed the port side bolsters and took everything home for rehab. It took four applications of Smith's CPES over four evenings to bring the wood back. We used 3/8-inch stainless staples to reinforce the Naugahyde where it was fastened to the plywood backing around the edges of all of the bolsters. It took two of us to carefully stuff the foam back and staple that one long bolster where the old staples had given away.

Then we took over the kitchen counter to thoroughly and clean each piece and it was amazing how much grime was on them after 32 years. We finished up with two applications of ArmorAll, although we had to soak the ArmorAll bottle in hot water before we could use it because it was frozen in our garage.

This little extra job was worth the effort. The bolsters look brand new and are ready to be reinstalled. In the meantime, they are being stored on our washer and dryer. With the cold weather, we're beginning to run out of space inside to store our various project parts.


Like everything else on this boat, one project uncovers another. To get one of the curved bolsters off, we had to disconnect the marine VHF radio. We never liked the way we had to originally fastened it to a piece of plywood that some idiot had jammed up under the helm and attempted to screw to the fiberglass, so that came out too.  We took some measurements and made some drawings to see if we couldn't fabricate a better mounting method.  We'd also like to make room to mount a second radio (amateur 144 MHz and 440 MHz transceiver) next to or under the marine radio.  That's proving to be more difficult than we thought, but we have some ideas.

Next weekend (January 26-27) we've taking a break from the boat to visit the Clark Museum in Williamstown Mass. Even for dedicated boat nuts like us, sometimes it's better to have fun doing something else.

Sunday, January 20, 2013

New power to the bridge

Other obligations kept us from boat work on Saturday (probably a good thing) but Sunday, with the snow melting and the temperature close to 50 degrees, we were back on the boat.

Our goal was to run new DC power cables from the batteries to the bridge helm. Like the lower helm, we want the starboard instruments and ignition circuit to operate from the starboard batteries and the same for the port side.  That meant running two #8 wires up from the batteries and one ground (also #8) because the original wiring seems to have a very robust ground circuit. These new power wires would parallel the original Silverton ignition wiring.

Once at the upper helm, we would divide the various accessory loads between the two new circuits. That will include the radar, the VHF radio, the chart plotter, the trim tabs and the air horn and, if we can fine the space, our 2-meter-70 CM amateur radio.

#8 cable has a mind of its own as soon it is off the spool. Keeping everything untangled took a little time.  Here's the wiring on its way to the bridge.


The white wire is actually plastic clothes line, which we had to pull up so that we'd have a pilot line to install the new transmission and throttle control cables later.

It took some tugging and running back down to untangle with wires but after a while, we got the wire bundle up the access tube on the starboard side and onto the bridge We then routed the three wires (less the clothes line) up under the helm were they will be connected.

Not a very interesting photo but it was great to see those big wires where they are supposed to be.


In the course of pulling up these wires, one of the loose #8 wires snagged our four-cell LED Maglight that was sitting on the deck and while we watched from above, flipped it into the bilge where we could hear it rolling down under the starboard engine. We'll put out a search party for that later.

When we started this part of the rewiring project, we removed the starboard Naugahyde bolsters so we could get a better look at all the wiring. This week, we thought WTF, why not take the port side bolsters off too and bring them home for cleaning and reconditioning?

As we mentioned previously, these bolsters are Naugahyde over foam, stapled to 1/4-inch plywood. They were in amazingly good shape for a 32-year old boat but the plywood had some small punky spots. We decided to apply Smith's CPES to the exposed plywood. CPES takes us back to our wood boat days, where it never failed us.  CPES glues old wood fibers together and stops the wood spores that create the rot. We brushed it on liberally and watched the plywood soak it up. More is better here and when the wood stops absorbing the CPES, that's enough.  Here's a bolster after a first application of CPES.  We'll reinforce each bolster with stainless staples before we reinstall them.


During the week, we also got a chance to strengthen our little cockpit ladder.  It seemed to us that simply gluing the steps back together would never hold up to frequent use on the boat so we added some aluminum strips, fastened to each section of step.


This was done on the bottom of each step, so no one will ever notice our "product improvement."

Friday, January 18, 2013

Rehabilitating the ladder

We love projects that we can do after work at home and this little ladder is one of them

Our Silveton came with one of these ladders that make it convenient to get from the deck to the cockpit - a very long step in our boat. The original ladder came with teak steps and like a lot of other things, needed refinishing.  We did that a couple of winters ago and it has held up nicely and looked great.

Two years ago, Frances found the exact same ladder, made by Garelick, and bought it.  The new version didn't come in teak but in "varnished oak" or some kind of white yucko plastic. Frances opted for the oak.

We used this ladder and its teak brother for two seasons and the newer oak version really began to look like crap.  The varnish, if that's what it was, peeled off and we hated it every time we looked at it. The original teak ladder continued to look great even with a lot of use.

After we were out of the water for winter storage, we brought the newer oak ladder home. It took about a minute to drill the aluminum rivets out of the frame. In another half hour, our belt sander had removed what little finish was left.


While this looks like a piece of oak with grooves milled into it, it isn't. It's actually four pieces of oak glued together to form the step.  The top step (the one that takes the most weight) broke apart in our hands as soon as we removed it. The bottom step stayed intact.

After sanding off the varnish and discoloration, we glued the pieces back together and set the step in our large vise overnight. The picture shows that step back together, although we describe below how we decided to reinforce it.

To refinish the steps, we like Sikkens Cetol Marine light. It has proved to be a great finish on high traffic areas such as our bridge ladder and swim platform. We've had good results with 6-8 coats (24 hours between coats).

Here are the steps after three coats of Sikkens.


We always mask the edges because Sikkens is thin and will run down around and stain the other side. We use cheap, 1-inch, brushes (after pulling out the loose hairs) that we can throw away after the application of each coat.

We really didn't believe that these steps would stay together with just the factory glue.  We added some strength by screwing aluminum strips to the underside of each step. Easy to do and you won't be able to see the reinforcement when the steps are in use on our boat. One screw goes through the center of each section of the step.


If you have an older Silverton and would like to buy another step for your boat, we found Garelick 25022 (oak step) for $109 at Wholesale Marine. The step comes with the clips you need to attach them to the coaming.Just remember that you'll have to refinish this thing after a year or two.

Saturday, January 12, 2013

Replacing the flybridge control cables

With the lower helm cables in place, it didn't make much sense to connect them at the engines because the flybridge cables connect at the same points. Let's not spend any more time than necessary crawling around the engine space.

On Saturday, we uncovered the flybridge and got down on the deck to see how the upper helm cables were routed. Everything comes up a PVC pipe on the starboard side.  We rigged some lights and began cutting away the dozens of cable ties that had been added over the years.  Once down, it was pretty easy to figure out


The dryer vent hose is original factory work and that length of hose contains the electrical wiring harness and three hydraulic steering lines.  The rest of the stuff must have been added later.


We traced back all the extra wiring and now know where it goes. Nothing terribly bad here, just sloppy looking. We'll cut out the dryer hose and tuck everything back up under the bolster when we're finished.

We did want to disconnect and remove the upper helm control cables so we could measure them and order new ones. Getting the starboard port transmission cable out was relatively easy and we elected to pull it up from the engine space with a piece of clothesline attached as a pilot line. The port engine throttle cable also came out fairly easily.

The starboard throttle cable was another story. The way the helm control was mounted, there was no way to get an Allen wrench on the bolts that hold the clamp in place. It was just too close to the plywood inside the helm console.

This photo shows the port throttle cable free of the clamp that held it in place. We finally had to completely disconnect the control assembly before we could get to the Allen bolts that held the other cable.


 Note the elegant factory-made cutout for the control assembly. You have to wonder how they originally assembled this if it was necessary to pull out the whole thing just to change one cable.


With the three cables out, we took them home and measured each one. The port throttle cable is 30 ft. long; the starboard transmission cable is 29 ft. long and the starboard throttle cable is 27 ft. long. We have to guess that these are the original 1980 cables. Like the cables to the lower helm, they are "no name" brands. The two throttle cables were very stiff even when disconnected. That's the reason we started this entire control cable project.

Before we quit for the day, we ordered three new Teleflex cables from MarinePartsSource. The cost was $144.96 with free shipping.  That brings the total cost of this project to $255.38.

On Sunday (after digesting a delicious New York Times) we took stock as to what we could do on the boat. The control cable replacement couldn't move ahead until the new cables arrived. We decided to clean up the area where the cables and wiring run along the starboard side of the fly bridge under the bolster.

At Christmas, Santa brought us a new fender to replace one that disappeared during Storm Sandy. Before we started on the bridge we attached some line to the new fender and mounted it on the front of the boat  with its three brothers.


To get a better look at the pipe that runs down into the engine space from the bridge, we removed one section of bolster. No surprises here really.


The long section of padding next to the one we removed always looked somewhat out of shape so we removed that one too.


You can see why it looked out of shape, The vinyl covering across the bottom had pulled away from the 1/4-inch plywood backing. The vinyl had been held in place by about 300 steel staples, most of which had dissolved into rust stains.  We have stainless staples on hand so we'll re-staple the vinyl back in place on both of these pieces and the ones on the port side as well. No big deal, but who in hell would use steel staples on a boat? We shouldn't be surprised,. Cheapo shortcuts like this can be found on many boats that cost a lot more than our value-priced Silverton.

The 1/4-inch plywood backing was stained but showed no signs of rot so we'll reuse them.

Next it was time to remove that ugly section of rotted dryer hose. We had to snip the reinforcing wire at every turn to finally get it off. The hose appeared to be purely cosmetic and we won't replace it.


During the dryer hose removal, we encountered two small bugs that fell out onto the deck. They had apparently been living in the hose and were in good enough shape to be able to walk rather briskly. We gave them a long walk off the boat.  Frances later identified these creatures as Stink Bugs and even produced a photo of them thanks to Google Images. She said that Stink Bugs are "very durible." Nice to know.


It was still early so we headed home to tackle one of the other small projects on our list.

We have two small two-step ladders that are useful for stepping from the deck down to the cockpit. The boat came with one as original equipment and we disassembled and refinished it several years ago.

We always wanted a second one and Frances researched and found the original manufacturer. They still made almost exactly the same little ladder and Frances bought one. We used it for two seasons but were disappointed in how fast it started to look like crap.  The mahogany on the original ladder had been replaced by some mystery wood coated with varnish. We drilled out the rivets that held it together and belt-sanded all the old varnish off.


We'll apply 6-8 coats of Sikkens Cetol Marine Light both of the steps. They won't match the original ladder but should be fine for our purposes.

Saturday, January 5, 2013

Installing cables is a two person job

The new lower helm control cables arrived on Friday afternoon so we were able to tackle the installation on Saturday. That's fast shipping considering that we ordered them on December 30 and the UPS Ground shipping was free. I think we like MarinePartsSource, wherever they are.

This was definitely going to be a two-person job and in fact, we don't believe it could be accomplished by one person, even with unlimited time. As it was, it took us four hours.

We began by taping the three cables together, slightly staggered, and marked them so we'd know which one went where. We had previously decided not to change the port transmission cable since it has always operated very smoothly from both the lower helm and the bridge.  We taped the three cables to the pilot (clothes) line that we dragged in when we pulled out the old cables.


Frances worked inside the cabin and tugged gently on the line as Bill pushed on the cables at the same time from over the starboard engine. That worked until the ends of the cables snagged on a partition under the salon floor.  Luckily, there's there an access plate that can be removed to get to that area, and so down we went.


Boating keeps ya young, doesn't it?

We were able to free the cables where they had snagged some wiring and were able to get them under the lower helm and then up behind it, were we ran into another snag with just two feet or so to go. Frances attacked from above behind the helm while Bill pushed and pulled the cables from below.


Eventually, we got the cables up, cut the tape off. and routed each one to its respective control.

The throttle and transmission controls always look a little cheap to us with plastic rather than metal covers but the control mechanisms under those cover are actually nice quality. Here's the starboard side finally connected.


We connected the port side cables and called it quits because it was starting to get dark. Tomorrow, we'll connect the new cables to the starboard transmission and the the carbs on both engines. If we have time after that, we may just disconnect the bridge control cables and pull them out.  This isn't going to be as easy as the lower helm was and we need to think about whether we should try to pull the new bridge cables up from the engine space or down from the fly bridge.

Tuesday, January 1, 2013

New Year's Eve in Newport


Each year, we try to spend New Year's Eve on the water. We've celebrated the New Year on the New Jersey shore, Sanibel, Ft. Myers, Greenport (several times) and Block Island to name a few. This year, we wanted to try Newport and since we decided somewhat late, we didn't have a lot of choices as to where we'd stay.  The Newport Harbor Hotel & Marina had an opening and we took it at $125 per night plus an additional $60 for a harbor view. A little pricey but this is Newport where everything is expensive.

The views of the harbor at sunset were worth it for us.


We were amazed at how casually some of the boats were prepared for in-water storage.  One large yacht, directly below our balcony, still had its wicker deck furniture out. We guess if you can own a boat like that, you can buy new deck furniture each spring.

As it got darker, we could see that some of the boats were still decorated with Christmas lights. A nice touch for a New Year's Eve.

Frances prepared a picnic basket for us to make sure that cocktail hour was properly observed. You can always count on the Commodore to remember everything!


Dinner was at the Black Pearl, a place we have been several times before over the years. For New Year's it was noisy and crowded but the food and service were really quite good. Call dinner for two with one drink each, $150. Good we don't do this every weekend.

The wind was blowing off the harbor when we walked back the two blocks to the hotel and it was cold and damp. Younger folks may have wanted to party. We thought it better to relax.

We slept in on New Years day and while I tried to take my traditional morning walk (a little cold to look at too many boats), Frances moved around our room in a nice robe that would have been even better if we could have taken it with us.


As a side note, you should know that our room was equipped with a Keurig coffee maker. It made some of the worst coffee known to man. If you happen to encounter one, make a whole bunch and bring it home to use as bottom paint.

The view from our room was just excellent that morning. We would loved to have been able to poke around the boats but, quite reasonably, those docks aren't open to the public.


We had breakfast in the hotel, which was great. We noticed at least one Marina group dining near us. Nice to know that boaters like us still get together in the middle of the winter.

After checking out, we walked down to the Armory antique co-op.  Frances made one purchase and passed on a drop-leaf table that she really wanted but decided to "think about." Who knows?  Maybe we'll be heading back to Newport with our station wagon to get that table some time soon.