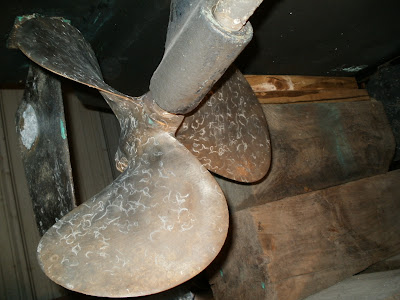
Saturday, April 30, 2011

All packed with nowhere to go

The weather was beautiful on Saturday, April 30 and the marina was packed with boat owners busy washing, waxing and repairing things.  It's nice to see so much activity after a long winter.


The river is at about 9-ft. right now and the Travel-lift is ready to launch boats, once the water recedes about 5-feet.


A couple of boats made it in earlier last week but they won't be going anyplace soon.  No big deal.  It happens almost every year.


According to our list, today was the day that we'd complete the packing of the stuffing boxes.  As noted last week, we got the starboard glad nut free using some spray stuff recommended by a friend in the yard.  Today, we tried removing the port gland nut with a big wrench and it wouldn't budge.  Then we sprayed it with the same spray-on product that we had used on the starboard side and the gland nut backed out with just a push on the wrench. We're not usually fans of anything in a can that promises to reverse the effects of physics, but we are sold on CRC Freeze-Off.  If you have something rust-bound or just corroded in place, Freeze-Off really works.


It is necessary to read and follow the directions, something we rarely do, figuring that our vast life experience will trump anything that is printed on the side of a can. In this case it says to spray Freeze-Off on for 20 seconds or more, then wait 5 minutes before trying to remove the bolt, nut or whatever it is. We're glad we followed the directions because Freeze-Off worked perfectly.

If the CRC marketing department sees this post, we'll gladly accept a case of your product in exchange for this glowing endorsement.

But back to the bilge and the dreaded stuffing boxes.  We tried 1/4-inch packing material on the port side but it wouldn't fit between the shaft and the packing gland.  We then tried 3/16-inch and it did fit. Here's what the packing material looks like.


We cut it to length by wrapping it around the shaft and using a utility knife to cut it. The piece you see on the left in the photo is the right length.  Here's what the first piece looked like as we pushed it into the gland nut.


We felt pretty good with the first ring in place so we added a second, taking care to offset the ends so they didn't line up.  The second ring went in OK, but we couldn't get the glad nut to go far enough down the shaft to catch the threads on the stuffing box.  So, we removed the second ring and then tightened the glad nut as much as we could to compress the first ring of packing.  That worked and we were then able to add a second ring.  There was no way a third ring of 3/16-inch packing was going to fit so we stopped there, leaving the gland nut hand tight.  We'll run the engine in gear at the dock for a while once we're in the water and adjust the tension on the gland nut to get a small drip.

Once that was done, we stuck our Shop Vac into the bilge and sucked up all the debris that you can see in the photos. Lots of junk came out.  We also cleared all the limber holes between the stringers.  Amazing how much material collects down there.

The stuffing boxes and a lot of the other work we did during the winter wasn't fun.  The starboard stuffing box today took 3-1/2 hours, laying between the engines and working with only our left arm.  The port side took 50 minutes, using only our right arm. But, there's another way to look at it. Where else could you get such great exercise and end of with a very enjoyable boat?

Sunday's weather was beautiful and the boat yard was crowded with cars, trucks, a few motorcycles and an absolutely magnificent bright green 1940's Studebaker stake truck, owned by Bob Belling who was there working on this 33 ft. Egg Harbor. Bob's a professional Studebaker restorer and any car or truck in his fleet always gets other boaters' attention.

We're getting down to the end of our long boat list.  We painted the few spots on the bottom where the bottom paint had chipped off leaving the barrier coat exposed, hosed some of the loose dirt off the cabin and deck and cleaned the boot top.  We also fired up the chartplotter, radio and radar and even put a course into the chartplotter for Old Saybrook to New London. We can certainly find our way without the aid of the chartplotter but it did serve to remind us how to put a new course in. Besides, it's fun to sit up on the bridge and think about actually floating again.

Then, after six months of bringing tools and supplies down to the boat, it was time to begin taking things off so Frances can do some cleaning.  For most of the winter, every horizontal surface in the salon was covered with tools. Now, it's beginning to look like a pleasure boat again rather than a workshop.


We're hoping that the Connecticut River will continue to behave.  The guys at the boat yard have to put in quite a few docks before they start launching boats for real. We're still hoping to get back in the water during the week of May 9.


Saturday, April 23, 2011

Team Toilet Wins a Big One

Today wasn't fun although it had a satisfying conclusion.

The last element of the installation of a new head and holding tank was down to running new "smell-proof" sanitation hose from the holding tank to the waste pump-out fitting.  Everything was completed months ago except running that one long hose from the deck fitting to the holding tank hose behind the vanity in the head.  We considered using the old hose that was already in there but, Frances asked why use old, compromised hose.  So we decided instead to purchase 12 ft. of  new 1-1/2" ID hose made expressly for marine heads.  Our plan - and we mean plan, because we discussed this thoroughly before we attempted it - was to pry up the old waste deck fitting, remove it, and then couple it to the 12 ft. of new hose and then guide the new hose in by pushing the new hose from the deck and at the same time, pulling on the old hose from our only real vantage point, the area behind the AC unit in the salon.

Here's what 12 ft. of this extraordinarily stiff new hose looked like on our deck before we tried to install it.


This stuff is Sealand hose made, we noted, in Italy and like pasta cooked there, was definitely al dente. No, those curves don't straighten out, even with a heat gun.

We pried up the old waste deck fill (extraordinarily bad quality piece of plastic junk) and attached the end of the old hose to our new Italian revenge Sealand hose.  Don't laugh, but this is what it looked like before we started feeding the new hose in.


We couldn't use ordinary hose clamps to hold the old and new hose together because we were afraid the clamps would catch somewhere, so we taped the two together using electrical tape. Electrical tape?.  Hey, it worked.

With Frances on the deck pushing and Bill on the floor of the salon pulling from behind the AC unit, eventually we pulled the new hose down to where we could at least see it.  Not a lot of room to work with there.


From there, the new hose had to run behind the AC unit , the galley cabinets and then into the area under the vanity in the head.  We won't bore you with the mistakes we made doing this but eventually, with lots of pushing from the deck and pulling from the salon, we managed to push the new hose all that distance.  It was a happy time on Act Three when we saw the new hose finally appear in the head.  Here it is on the deck and in the vanity.


We installed the new new waste fill on the deck and will make one more connection under the vanity tomorrow. 

 The hoses we removed were not up to modern boating standards.  Silverton apparently plumbed the head waste with exhaust hose.  It was so soft we could jam a screwdriver through it.  We can only imagine how it would perform with human waste in it.  Sorry, bad thought.


 We were both tired at this point and Bill tends to make mistakes and get grumpy if worked too long.  Time to go home and have a good dinner.

Easter Sunday

We began the day with The New York Times as we do every Sunday during the non-boating months.  Properly nourished with "all the news that's fit to print," we headed to the boat.  We began by finally finishing the head/holding tank installation.  That meant connecting the hose to the waste deck fitting that we installed yesterday to the holding tank.  That done, we reinstalled the shelf under the vanity that we refinished during the winter.

Next, we lifted the engine hatches, set up some lights and crawled down between the engines to deal with the dreaded stuffing boxes.  For those readers who have boats with out-drives or outboards, the stuffing box on an in-board powered boat is really just an assembly that allows the engine's propeller shaft to exit the transmission on the back of the engine and go out under the boat to the prop.  That means that it is supposed to keep water from leaking into the boat around the shaft as it spins.  That's accomplished by a gland nut that forces cotton fiber strips down into the place around the shaft where the shaft exits the bottom of the boat.  Today, stuffing boxes no longer use cotton but instead use thin strips of Gore-Tex or other lubricated fabric.  When this stuff gets wet, it swells up, sealing the joint except for a few drops of water. The trick is to tighten the gland nut just tight enough to allow a tiny amount of water in.  Too tight, and the shaft overheats as it spins through this gland and that can result in a broken shaft.

The stuffing boxes on our boat dribbled at the dock and apparently admitted a lot of water while underway. Today, we found out why.

Our tools consisted of a 14-inch and and 18-inch pipe wrench, big enough, we thought, to back out first a 2-1/4-inch lock nut and then the packing gland that is the same size.  The space turned out to be very limited for wrenches that big and even when we got a grip in the lock nut, we couldn't break it loose.  A friend at the boat yard gave us a can of some kind of "freeze off" penetrating oil.  We read the label, decided it would never work and sprayed it on the starboard stuffing box. After waiting for ten minutes, we applied the pipe wrench again and the gland nut backed out perfectly.

Here's what the glad nut looked like after we unscrewed it.


In this photo, the gland nut is pushed back up the shaft.  The shiny spot on the shaft was where the gland nut would normally be when assembled.  The rusty area above the stuffing box is actually on the starboard V-drive.  This gland had been leaking for years. The rust on the V-drive was superficial.  We'll prime and paint that once this stuffing box thing has been fixed.

Here's a closer shot that makes this easier to see.


We probed the inside of the gland nut with a small screwdriver looking for old rings of packing material, which would have to be removed  We found a few fragments but basically, there was no packing material left to speak of inside that nut. No wonder it leaked.

The photo makes this look easy but in fact, there is very little room down there to apply a wrench properly.  We also found lots of debris and crap back in that area.  We stuck our Shop Vac down there and sucked up lots of old wire connectors, a few nuts and screws and some old oil.

Next weekend, we attack the port stuffing box and maybe, if we're lucky, pack them both and cross this nasty little task off our list.


Saturday, April 16, 2011

You know it's Spring in Connecticut....

when the Connecticut River floods.  This picture was taken on Saturday and it shows where the well and docks normally are. The river was at 10 ft. (flood stage is 8 ft.) and it is down from 11 ft. earlier in the week.


Our guess is that the river will eventually go higher, in fact, quite a lot higher given the amount of snow-melt on its way from Vermont.  That 52-ft. Ocean shown in the picture could very well float unless the guys in the yard move it, which we're sure they will if the river really comes up.  It's funny hearing many of the boat owners who are new to Portland Riverside asking how they can get their boats in the water and escape the flood.  No chance of that at this point.  The river was running at 6-7 mph or better and today, the wind was 20-30 mph.

Meanwhile, Act Three was waiting patiently in the shed for May 9, her proposed launch date.


Today we replaced four more of the lower station gauges and then climbed down underneath and replaced the zincs on the trim tabs, rudders and shafts. That's another $76 but good insurance against electrolysis. Oh yeah, we hand sanded the prop shafts too.


We also revisited the removal and replacement of the hose that leads from the new holding tank to the pump-out fitting on the deck.  This fitting is a problem, since we can't pry it up far enough to unscrew the pipe clamp holding the old hose to the deck fitting.


This hose, probably 12 ft. long, runs from the deck, then curves forward down past the the front of the AC unit, behind the galley cabinets and into the area under the vanity in the head. From what we can see, it isn't clamped anywhere but it just doesn't want to move.  Today, we removed the AC air inlet grill in the salon to get a better look. It looks like the old black hose is binding where it passes through a piece of 3/4-inch plywood.  Holding the camera inside next to the AC unit gives us some reference.  Remember, we not only have to pull the old sanitation hose out, we have to use it to snake a section of new "smell-proof" hose in.


This is definitely a two-person job and Frances and I will have to come up with a plan. Cut the old hose and pull/snake it that way?  Maybe.  While the old hose is difficult to work with, the new hose isn't much better.  While it is smooth on the outside, it is extremely stiff.  Maybe we can leave it draped over the car in the sun for a few hours.  Whatever we do, this isn't going to be easy.

Sunday: whitecaps on the river
Sunday morning, we had to help with a circus promotion at a New Britain Rock Cats game.  Lots of kids each of whom seemed to love baseball.  Nice to know that there are still youngsters who do something other than sit at a computer.

When we finally got to the boat the weather was bright and warm (after a night of hard rain) and the river was on its way up again.  The wind was now coming from the south at a good clip, kicking up little whitecaps in the river.  Parts of Route 17A in Portland near the fairground are now closed with water over the road. The National Weather Service is predicting 13.2 ft. mid-week.  That's still nothing terrible but perhaps a 3-year event. In years past, we have had to wear waders to get to the boat.

This is what the road down to the launching well looked like in 2007, the last time the river came up more than normal for the spring. This was taken from in front of the shed where our boat is now. Even with this much water, none of the boats floated, although it was almost up to our waist as we took this picture.


We were able to get a few things done in the limited time we had Sunday afternoon, the main one being vacuuming the bilge of all the junk that had accumulated there in the fall before the boat was put in the shed.  We also checked the batteries and added a little water to two of the four and remounted the aft bilge pump.

We also checked the engine, transmission and v-drive fluids and all were where they are supposed to be.  The engine oil does need to be changed and we'll do that as soon as we get in the water. Getting at the port oil filter should be fun  Need to get a big aluminum turkey roasting pan to put under the filters to keep from spilling oil into the bilge.

We have remote oil filters for both engines but installing them is going to have to wait until next winter.  Time is getting short and we still have a lot to do.

Sunday, April 10, 2011

Time to get under the boat

On Saturday, we completed the wiring changes we wanted to make on the bridge and that involved mainly installing a new port ignition switch. The one on the starboard side came out fairly easily last weekend but the port side switch had no intention of going gently. The screws holding the wires to the terminals on the back of the switch were welded in place by age so we had to cut them off, put new compression lugs on the old wires and attach them to the new switch. Doing this was quite comfortable, since we were lying on our back with a seat cushion for a pillow and nearly every tool we owned right next to us.  Here are the two new switches installed: first the port side and then the starboard.


We tested the radar, the chart plotter and the VHF marine radio and everything worked as expected. Cross the bridge wiring off the list.  Now it was time to get down under the boat.

The bottom looks really good and it should after all the work we put into it last winter. We'll touch up the black bottom paint in a few small spots but other than that, we need to take the marine growth off the rudders and props.  There's not a lot on there and I'm not sure that we spent much time on them last winter.  There were some barnacles and some crazy little worms or whatever they are.  They came off with some work using an electric drill and a wire brush.


The water intakes for the engines also had a few barnacles but they came off with a little effort.


We also found that that the cutlass bearings were nice and tight. Nice to know that we won't have to deal with that this year.

On Sunday, our first order of business was to pick up the inflatable and slide it back down over the stern and into its davits.  We were dreading this because this thing is heavy and difficult to move around.  However, with Frances on one end and Bill on the other, it went over the stern railing and slid down close to the davits without too much trouble.  Bill got down on the ground behind the boat and lifted the inflatable with his head and it clicked into the davits.

Now we had room to open the engine hatches and get the things done down there that are on our list

This is the first weekend that the marina has water turned on and suspecting that, we brought a long hose with us. Turns out, we didn't need it as we were able to borrow hose from a couple with on nice 33-ft. Egg Harbor that is stored right in front of us.  We filled our fresh water tank and pushed out most of the potable antifreeze with the DC pump and all faucets on at the same time.

With water in the tank, it was time to test the new head.  We got out the camera and Frances planted herself on the seat and hit the "flush button."  Smiles all around as the water swirled into the head and down into the new holding tank.


The deck fitting that enables us to pump out the new holding tank is still an issue.  Working together, we pried up the old deck fitting as far as it would go but not far enough to disconnect it and replace it with a new gasket-ed deck fitting.  We pried and examined it for a while and came up with a method to remove it that will take a few more tools and a little more time.  Often, it's great to have another set of eyes and another opinion when something really difficult comes up. We'll get it done even if it does take some extra work. We both came up with some ideas on how to proceed.  As Frances always says, "80% preparation and 20% execution"...we will get this to work, together.  This is the most difficult task we have been faced with.  Stay tuned!

Four weeks to launch. We need to pick up the pace a little.


Sunday, April 3, 2011

Swim platform re-mount

 This week, the day before Frances left for Florida for a family reunion, we took the swim platform to the boat. It took the two of us to lift the damn thing up onto the brackets.  Once it was up there, we left since Frances had a lot to before her flight the next morning.

On Saturday, I arrived at the boat with a long list of things to do.  The first would be easy: bolt down the swim platform and install the refinished boarding ladder that attaches to the swim platform.  I felt that could be accomplished in 30 minutes, tops.  I had forgotten that this is a boat and as such, it will resist anything you try to do to improve it.

The swim platform is supported by four stainless brackets and each one has three mounting holes. Should be easy to line up the first one and the rest will fall into place, right? Not quite. The first one lined up but the new stainless bolts I had were too short. How could that be?  The swim platform is 1-1/4 inches thick and I was using 1-1/2-inch stainless bolts. It seems that I forgot that the aft-most mounting hole in the bracket has the support welded to it. Luckily, the marina store has a great supply of good quality stainless hardware and $1.20 later, I had four new 1-1/2-inch bolts.  It took the better part of two hours to finally get the swim platform lined up and bolted in place. Nice and solid and it looks great, too.

Then it was time to re-mount the boarding ladder that is screwed to the transom at the top and bolted to the swim platform at the bottom.  Our guess is that this ladder was whacked some time in the past because it was difficult to take off and really fun (not) to put back on. The transom mount was fairly easy.  Just four 1-1/4-inch stainless sheet metal screws that go through the transom and into some plywood that is glassed into the inside of the transom.  Luckily, the marina had those in stock too.  I was determined not to use any of the old mounting hardware.

But down on the swim platform, things didn't line up.  I had three old mounting holes to work with and a ladder that didn't match up. I found that if I backed out the Allen screws that held the steps in place, I could twist the sides of the step assembly enough to get them to line up with the old mounting holes.  This isn't a factory-original swim platform and the holes that mount the ladder are really close to the edge of the teak swim platform. You can see how close it is here.


Here's how it all looked, once everything was bolted back into place.


The photos also show the Weaver Extended Davits that went back without argument. The whole thing looks good and will probably serve us well. I danced around on the swim platform since Frances was away but I soon got control of myself and covered the swim platform with a sheet.  If you'd like to know what I was listening to as I danced around the swim platform, just ask.

Our trusty inflatable is in the cockpit and even though it's only 9-feet, 6-inches long it is definitely the elephant in the room.  I pushed it around so that I could a get access the bridge.

We've always had issues starting the starboard engine from the bridge.  We tested the ignition switch and sure enough, it was intermittent  in the "start" position.


We installed a new Cole Hersee heavy-duty marine approved switch and the old engine cranked right over. We'll do the port side next weekend.

On our cruise-from-hell back to Portland last fall,  we also had an intermittent failure on all of the starboard bridge instruments.  Found the cause of that, too.  Whoever installed the new gauges on the bridge didn't tighten one nut on the back of the voltmeter, where current is supplied to everything else on that side. Tightened that down and everything works fine.

Of course, I installed those new gauges.  Stupid mistake and I should have known better.