Sunday, December 29, 2013

Back to the list of winter projects


We started off this weekend by mounting the newly refinished teak strips on the anchor pulpit. Before doing that, we scraped off the last of the crud and stains that had accumulated on the pulpit and then waxed it.


When we took these teak pieces off, there were bungs over the screws. Since the bungs disintegrated when we pried them out, we remounted the teak using stainless finishing washers. Looks OK to us considering that you have to be standing on the deck right over the anchor line to even see them. Makes us feel good, anyway. Note to cheap New Englanders like us: We used the original 33 year old mounting screws and they went back in perfectly.

Time to get to some more serious stuff. We need to replace our 6 gallon electric water heater. It seems that sometime over the years before we owned this boat, someone put some diesel fuel or gasoline in the water tank.  Frances spent a lot of time over the last few summers flushing the system and while the cold water is now fine, the hot water side still has that slight diesel smell. Since we've flushed out everything else, the only part left is the water heater.

We crawled down beside the port engine to get some measurements. The old Raritan water heater is circular, 15 inches across and 15-3/4 inches high. It's screwed down to a plywood base that appears to be in pretty good condition. As you can see from the pics, the plumbing is a mess, as you might expect from a 33 year old boat.


Our plan is to remove all of the old 1/2-inch water hose and replace it with PVC. We'll have to make some connections, such as the accumulator tank, fresh water pump and faucets in the galley and head with 1/2-inch water hose. If there are no transition fittings from 1/2-inch PVC to 1/2-inch marine water hose, we'll use all hose. Since most of this plumbing is under the salon floor, we think we can pull new hose (or PVC) in using the old hoses as pilot lines.  That worked when we installed a new waste pump-out line.

Removing the hot water tank
Sunday was dark and rainy but that old hot water tank definitely wasn't going to jump out of the boat by itself, so down we went to remove it. 

The hose clamps on the cold water supply and the hot water hoses disintegrated when we tried to loosen them. That's fine; all of this stuff is going to be replaced. We cut the hoses with a utility knife and drained the tank into the bilge.


To get the last of the antifreeze solution out, we had to tip the tank almost on its side and to get clearance to do that, we had to remove the coolant recovery bottle on  the back of the port engine and the bilge blower. As the last of the liquid drained, we saw that Frances "oil in the water heater" theory was correct. Thick gobs of smelly black goo slithered into the bilge. The whole engine space smelled like diesel fuel.

Once the tank was empty, we turned it around, took off the access plate and cut the AC power wires. Then we wrestled it out behind the port engine. Apparently, we dislodged more diesel scum as we moved the tank.


We keep some clean shop rags on the boat and we used those to sop up the mess. Once it has dried a little, we'll attack that area with our Shop Vac. We'll also replace all those dirty old passive vent hoses. And maybe a new bilge blower, too. Hell, it's only money.

It looked a little better after we cleaned up most of the water and oil.


The AC wiring for the water heater was quite a mess. Whoever maintained this boat for the previous owner loved butt splices. There are probably half a dozen in that rat's nest of wiring hanging down. We'll cut all of those out and rewire the whole thing properly.

It would be nice to be able to get back in there so we could do some real cleaning and wiring. However, that means crawling over or lying on the top of the port V-drive, which you can see at the bottom of the photo. We're thinking of building a platform out of scrap plywood that would rest the stringers or down into the bilge to protect us from the V-drive and give us a semi-comfortable place to lie as we worked in that corner.

Like all boat projects, each one gets bigger as you delve into it. But, as we've said in previous posts, we just can't do anything half-way.

As we left on Sunday afternoon, the Bad Boy was on the deck, waiting for better weather before we drag it over to the Dumpster.


Wednesday, December 25, 2013

Polar Navy


Sometimes on a cold winter afternoon, it's fun to plan a cruise or, as we have done here, set up a route that we can use on our Netbook computer when we're underway.

The navigation software that we've been using for the past couple of years is made by Polar Navy and it comes in two pieces: PolarView (the chart application shown here) and PolarCom, which is a simulated set of navigation instruments that can be set up to show Heading, Speed Over Ground, Distance Covered, etc. In fact, you can set PolarCom up to display virtually any information you have available in NMEA 0183 (or NMEA 2000, I believe) format.


Here's the PolarCom application running over PolarView. Here at home, we don't have any GPS input so it's showing the default, Current Position, Speed over Ground and Course, all of which are zero. The default instrument size is somewhat big, but you can make it smaller and move it around, out of the way, on the chart by just dragging it.

PolarView costs just $39.95 and PolarCom comes with it for free. That purchase gives you a license to download any of the ENC or Raster charts whenever you want to. You also get three seats, so that you can load it onto a home PC and perhaps a laptop, as we have done.

If you create a route for an upcoming cruise at home, PolarView makes it easy to export that data (via an Excel .csv file) to a flash drive and then later, import the data onto your boat computer.

PolarView is also integrated with Active Captain data so you can click on an Active Captain point-of-interest and read what other Active Captain members have said about it.

You can name the routes and the individual waypoints and waypoints can be shared between routes. Once a route leg is established, PolarView shows you its distance and relative bearing to the next waypoint, which is really useful.

We use our little Acer Netbook and a small puck-type GPS receiver while underway. Our boat's position is shown on the chart at any scale we choose, making it easy to follow a particular planned route without leaving a snake-wake in the ocean behind us.

Sure, all of this can be done with multi-function navigation displays but they cost a lot more than we're willing to invest. We use a Standard Horizon chartplotter that gets its GPS info from an external antenna and sends waypoint data to our old reliable Furuno radar, but the PolarView chart display on our computer is so much easier to read and from what we can see, the GPS position is also more accurate.

It is also really tedious to plan a route on the Standard Horizon plotter with its little joystick. Now we plan the route using PolarView and then just key in the coordinates of the waypoints in on the chartplotter.

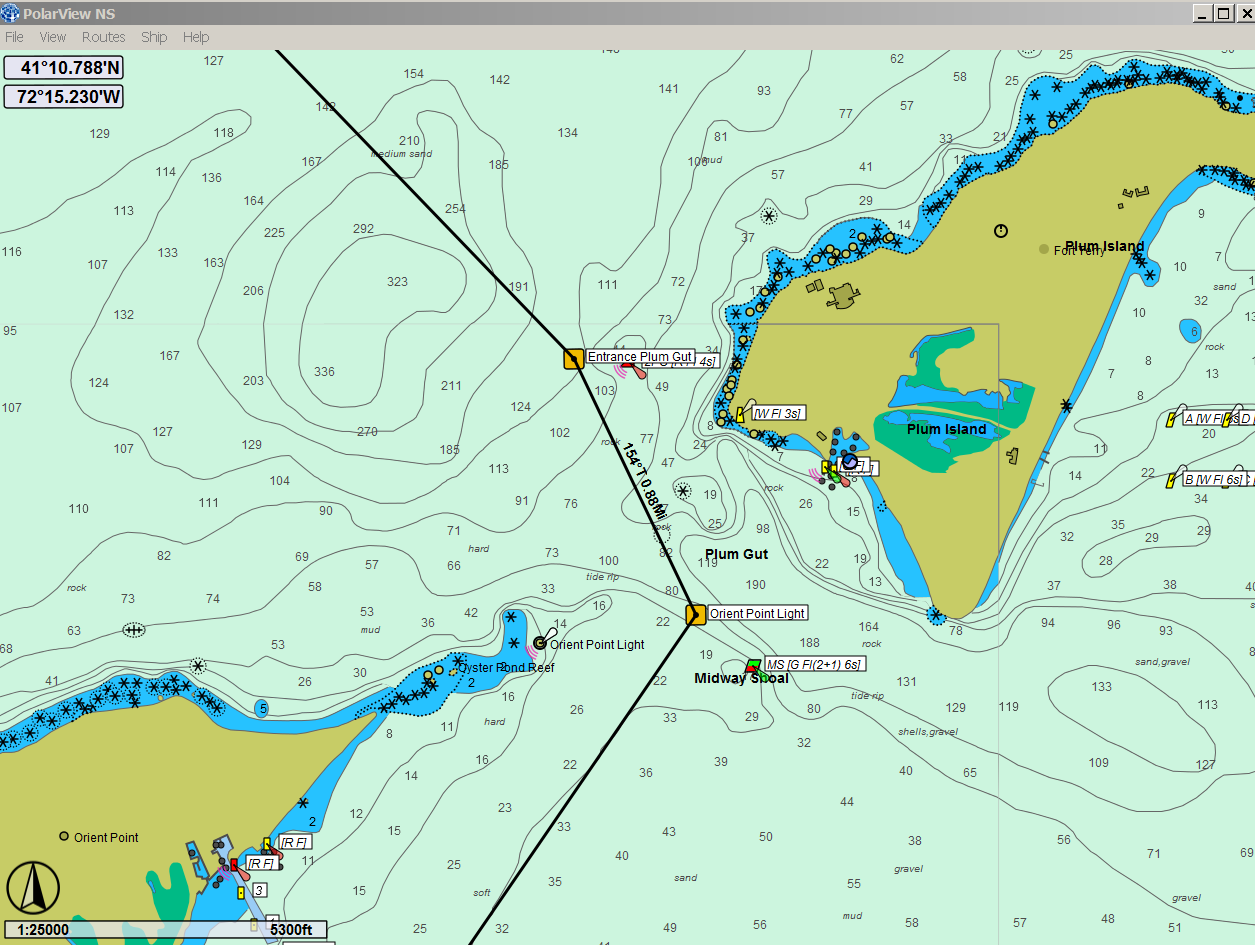
The first screen-grab photo above shows Plum Gut, one of of favorite 0.88 miles of water. We've probably been through there 200 times and we don't really need those waypoints but, there were those times when the fog was so heavy that...

But we all have our fog stories so we won't bore you with ours.

Sunday, December 22, 2013

Anchor roller project over


It seems we've been fooling with the new anchor and anchor roller forever, but on Saturday, with the temperature at 57 degrees, we finally got the roller roller mounted. We used the roller itself as a template and drilled the three 3/8-inch holes in the pulpit. We also plugged the old holes to protect the core in the pulpit. We used three 3/8-inch x 2-inch stainless bolts, nuts and fender washers. You could dance on the damn thing now.

We ended up mounting the roller much further forward than we originally thought. In a previous chapter of this blog, we showed how we experimented with the mounting position. Farther back, the new hinged plow anchor looked like it just might whack the hull on the way up so we went out as far as we could.

Today we drove off to the boatyard with everything we needed except the new anchor. We'll attach the anchor tomorrow and then run it up and down a few times to see how it works.

While we had a nice warm day, we crawled under the boat to check the props, rudders and zincs. No digs in the props and there are a couple of zincs that we won't have to change. Looks like we'll have to run a wire wheel over the rudders and props to get rid of the tiny little shellfish that we always seem to collect. The power washing takes most of them off but we do have lots of little white circles left. You can see them in the video we made today.

We also walked down to the river and saw it in a way that we rarely do. It was completely still, with lots of ice fragments. No tidal movement at all. We suspect that there was just enough snow melt to hold the tide steady. Just north of the marina, the river was still all ice but with a nice channel cut through it. We have to assume that the path through the ice was made by the Coast Guard Harbor Tug Bollard earlier in the week. The Bollard patrols the Connecticut River every winter to break ice and is always a welcome sight when the weather is really cold and the river is frozen over.

Here's some video. It's only two minutes but making videos helps us renew our video editing skills, some of which we haven't used in quite a while.


On Sunday, we mounted the new anchor on the anchor line and pulled it up. We noticed that if we ran the anchor up until it wouldn't go any farther (actually, when the eye on the end of the anchor line hits the mouth of the windlass), the anchor would jam at the roller just behind the anchor hinge. To get it to release, we had to give it a shove and we obviously can't do that when we are trying to anchor. We needed to shorten the chain slightly.

To do that we lowered the anchor back down and removed two extra shackles that for some reason had been added to either ends of the chain over the years. That made the chain about two inches shorter. The anchor then dropped fairly predictably but to make it exact, we'll have to remove one link of chain. We didn't have tools with us to cut the chain today, but we'll put that on the list and fine tune the chain length over the next few weeks.

Merry Christmas, everyone.

Sunday, December 15, 2013

Snow interrups boating projects


What was billed as a massive storm didn't quite turn out that way here in Hartford. Friday afternoon, the city used its emergency warning system to call every home and business to say that doom would become us if any cars were left parked on the street from Saturday morning through Sunday afternoon. The Mayor himself had recorded the message, which was delivered as one line in English and then that line repeated in Spanish. We hung up after the third sentence. We get it. We live in Southern New England where it snows in the winter. Of course lots of cars were left on the street and nothing happened except that the plows went around them. So much for effective government.

Anyhow, we started up the old snowblower on Saturday morning and took care of the six or eight inches of snow that had accumulated. Here's a picture. Don't get too excited looking at it.


By Sunday afternoon, we got around to some really important stuff: Drilling three 3/8-inch mounting holes in the anchor pulpit and sanding the finish off of the teak strips that serve as step pads on the boat.

Luckily, we had purchased a new 3/8-inch drill bit for this and we're glad we did. The pulpit is advertised as stainless and is 3/16-inch thick and it took a while to get through it.

Last week, we measured the pulpit so now we'll use the holes in the anchor roller to mark where to drill the pulpit itself using the same 3/8-inch drill bit, which about all it's good for now.


We're going to treat the new (and old) holes in the pulpit with epoxy, just in case it is balsa-cored, which it probably is. That will keep the water intrusion at bay. Then we'll mount the new anchor roller bedded in 3M 4200. It will never come off again in our lifetimes.

Then we went at those little teak strips. All of the old finish had to come off because we are going tt treat each strip with CPES before we begin to apply the Sikken Cetol. As we mentioned previously, there isn't much left of these little strips, having been stepped on for 33 years. We tried hand sanding them with 80 grit but that wasn't going to do it. We used our belt sander clamped upside down in a vice and very carefully sanded each strip. That actually worked pretty well.


There's still some old crud in the grain of a couple of strips but we can't really afford to take off any more material at this point. They are getting very thin.

We mixed up a couple of ounces of CPES and brushed it on. We love the smell of CPES and varnish. Guess it reminds us of past boat projects.

The strips soaked up the CPES immediately.


You can see in the upper right hand corner where we marked each strip. The Silverton "craftsmen" just slapped them down when the boat was made so each strip now has its own unique mounting holes.

We also got some work done on our boarding steps. We refinished this one several years ago but it was beginning to show some wear.


We took it apart and then spent some time polishing the aluminum with YachtBrite Buff Magic. One of the rubber tips had split, so we replaced them both with new ones from Home Depot. Five bucks for four. Guaranteed to last two summers.

As you can see from the picture, the aluminum polishes nicely.


As good as it looks, this won't last. Aluminum just isn't compatible with a salt water environment.  Maybe we can spray it with some coating, but I think we'll be taking these off again in a few years and polishing them again.

Sunday, December 8, 2013

Even more anchor roller

We're itching to mount the new anchor roller and anchor but still can't figure out how far forward to mount the roller on the pulpit.  This week we did some reading on the subject and even asked about it on the Silverton Owner's Club forum. We only got one direct answer and that was to "mount it so the front edge of the roller extends 3-4 inches past the front of the pulpit. Fine, but that will put the anchor farther back than it was with the old anchor roller that held the little Danforth anchor.

Another SOC member (one that really seems to know what he's talking about) noted that he had trouble releasing the plow type anchor on his previous boat. He said that someone would have to go forward and give the anchor a kick before it would drop. We checked another site that we like (The Hull Truth) and found some similar comments.

What to do? Frances came up with the idea of temporarily clamping the anchor roller to the pulpit, mounting the anchor on it and then see what happens when we hit the "down" on the windlass. We're going to do that tomorrow after we stop and invest in a half dozen more c-clamps.

It seemed colder than the 40 degrees shown on the thermometer on the boat when we arrived today. Our little electric heater added 10 degrees in about a half hour but today, we needed to work outside.

We covered the front deck section with a blue tarp. No sense in exposing the boat (and the inflatable that is being stored there) to all the dirt that will blow through the shed during the winter.

We also removed the teak trim strips that serve as step pads when getting on the boat.


There's enough wood left to refinish them once or twice more before we have to give up and resort to the usual step pads that most boats use.  We refinished these strips three years ago and they don't look all that bad considering they have been stepped on about a thousand times since then.

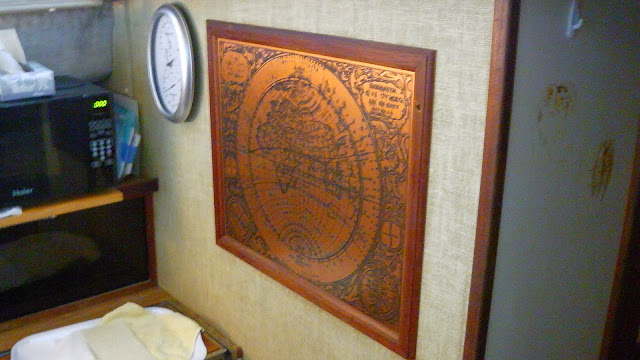
Before we left on Saturday, we removed the hideous framed "thing" that Silverton put on all of these boats for a number of years.


It always looked like a cheap piece o' shit to us.  Frances has some ideas about what she'd like to put up there in its place. Of course, that means that the wall where that thing hung will have to be repainted as will the wall to the right in this photo, were we pried off some junk that the previous owner had mounted there. We're going to use the same color paint that we used when we refurbished all the doors and cabinet fronts a few years ago. That still looks like new even today.

We guess that the corner molding in the picture could use a little help too, so we'll add that to the list.

That list keeps getting longer but we love doing this stuff during the winter.

Sunday was gray and cold or at least seemed pretty cold to us.  We stopped at Harbor Freight and bought four five-inch c-clamps for $5 each and then headed to the boatyard with the anchor roller and the new anchor in the trunk. We also brought numerous plywood shims, just in case we had difficulty clamping the roller to the pulpit.

The railing around the pulpit looks crooked in this picture but it isn't. We just weren't standing directly in front of it when we took the picture.

We plugged the boat in, fired up the heater in the cabin and put on our gloves. Everything metal felt  like ice. We put up our extension ladder and then clamped the roller to the pulpit. We were able to fit just two clamps but it seemed sturdy enough.

Frances was stationed on the fly bridge where she would work the windlass. I explained that to operate the windlass, you pulled the switch out (to unlock it) and then pushed it up to raise the anchor or down to lower the anchor.

Then Bill went down to watch just how the anchor behaved when it was pulled up through the new roller from where we had it staged on the ground in front of the boat.

If you listen to the sound carefully in this short video clip, you will hear us sounding something like George and Gracie. If you are a lot younger than we are, you probably won't know who George and Gracie were and that's your loss. They were funny and we laughed when we edited this sequence thinking about how we sounded like them..


The results of our test showed us that the anchor will right itself once it gets to the roller. The new roller will accommodate the plow anchor but we'll have to mount the roller much farther forward to get the anchor shaft to seat properly and to keep the hinged plow on the anchor from hitting the underside of the pulpit while underway.

We made some marks on the roller to show where to drill mounting holes, put everything away and went home. Mission accomplished at least for this weekend.


Saturday, November 30, 2013

Anchor roller


Before starting this next boat project, we had a fabulous Thanksgiving, thanks to Frances, who really knows bow to do it. She makes her own pie crust and that, together with apples that were given to us by our dock mates, Lou and Janie, turned out a prize winning apple pie.


Even the turkey seemed just right, as did the squash, mashed potatoes and creamed onions. We say this every year, but this really was the best Thanksgiving!


On Saturday, we returned to our next boat project. Replacing the old anchor roller with one that would accept our new 35 lb. hinged plow anchor.


In previous posts, we showed us removing the old roller and cleaning the bow pulpit.  Now it was time to buy a new anchor roller.

We researched all of our alternatives (there weren't all that many) and decided on a Windline CRM-1 roller. Prices on the internet were all over the place but we settled on Defender Marine, which is close to us so we could actually see it and measure it. We saw this particular roller for almost $350 but at Defender, we paid $169.99 and we were able to talk to some real boaters who knew what we were trying to accomplish.

Then we drove back to the boat and test fit the new roller. Are any of these boat projects ever really easy?


Of course, the new roller doesn't fit the holes in the pulpit used by the old one. We'll have to close the old holes up with some epoxy and filler. We're not sure that the roller is far enough forward of the edge of the pulpit. The old roller that held our 18 lb Danforth stuck out much further.

Mounting this thing will take a little thought. We can't reach the pulpit using our regular ladder so we're going to have to bring down an extension ladder. The new roller is 3/16" thick steel, so drilling that should be fun, but doable.

We also brought home one of the two little ladders that hook on the cockpit coaming. The coaming is high and without these little ladders, it's really a big step to get on or off the boat.


This ladder was on the boat when we bought it and three years ago, we disassembled it and refinished the teak steps. We bought a second ladder that was almost an exact match for the original but it had oak steps.

Given the use this ladder has had over the past three years and the fact that it is outside in the cockpit all the time, it really isn't in bad shape, except that one of the rubber feet had given up the ghost.


When we refurbished this ladder the first time, we stripped the steps completely and applied five coats of Sikkens Cetol Marine Light. Even after being stepped on literally thousands of times since then, the Sikkens is still in very good shape. Only the step edges need attention. But, since it's home and it's cold outside, we'll disassemble it again and see if we can build up some Sikkens on the wear points.

Not very exciting, we know, but it's part of the fun we get out of maintaining our boat.

Sunday morning presented us with some ice here in Hartford. At 7 AM, we backed the car our of our garage and then slid all the way down to the street. Not a great way to begin a quiet Sunday morning.

Within a couple of hours, the ice melted and we decided to load one of our extension ladders into our station wagon and take it down to the boat yard. We wanted to get access to the bow pulpit so we could see how the new anchor roller would mount.


Perfect. We'll leave the ladder at the boat, locked to one of the jack stands, just in case someone else decides that they need our ladder.

What we're trying to figure out now is how far forward to mount the anchor roller. The old one, with the 18 lb. Danforth, stuck out a lot farther than this.

Maybe someone at the Silverton Owners Club can help us with this.

Below is a video we created about applying CPES to the teak strips we took off of the bow pulpit. If you know us, just skip the video. It's fairly boring and the audio levels are too low. But it gave us valuable practice in editing and with things the way they are, knowing that is a good thing.


Saturday, November 23, 2013

In the shed


The boat came out of the water last Monday and from the looks of the place, so did a lot of other boats. When we left last weekend, the docks in the shot above were full. From what we understand, the yard crew worked even through the rain to get almost everyone out. Today they looked tired and were allowed to quit at noon.

Ken and Elsie Gouin, who own the yard, head off for Florida each year on the day after Thanksgiving and Ken likes to know that the majority of the winter storage boats are where they are supposed to be before he leaves. Ken's middle son, Wayne, heads up the crew.

During the summer, Ken and the crew leveled more area in the front of the yard to gain additional  space, especially for bigger boats. As part of that, they they buried utility lines and installed water and electricity for that new area. Ken is a retired shop teacher who can do just about anything.


As you can see it's a little tight in the shed but it always is. We know most of the owners of the boats around us so it doesn't make any difference. (Just noticed how crooked the boat name is on our bow. We'll fix that too.)

Chances are, by next weekend, they will have moved those mast dollies in front of us and put a boat or two there.


We left our bridge enclosure up this year and it is a tight fit. Looks like we have about a foot a foot between our top and the underside of the shed roof.


If we were three or four feet over to the left, the top would have scraped on a girder that runs from the back of the shed to the front. This parking is all done with a hydraulic trailer pushed by what was once an airplane tug.

While we were there today, we wanted to measure the bow pulpit once again.


We were interested in knowing what the distance was between those railing bases (5-3/4") before we go out and buy a new anchor roller. We don't know if the new roller will even mount that far back (we doubt it) but it's probably better to know this stuff before before we visit Defender in Waterford.

Down memory lane
We've been at Portland Riverside for 27 years. Our Silverton is the third boat we've had during that time. The first one ("Mad Dog") was a 28 ft. Luhrs (wood) that we bought from a guy in this yard. It needed quite a lot of TLC and in those days, it was easy to get a crew to help: just give them a lot of supervision and a case of beer.

Here we were in July, 1986 and that old boat still wasn't quite ready to go in.


Amazing. I think Bill still has those shorts.

That old Luhrs leaked just as all those clinker-built boats did, but we took it all over and had lots of fun with it. When we bought the second "Mad Dog," a 32 ft. Chris Craft Sea Skiff, we gave the engine in the Luhrs to someone who had ruined his by not winterizing it properly. Then the crew at Portland Riverside kindly cut the Luhrs up with a chain saw and burned the pieces during the winter  in the wood stove in their shop.

Can't do stuff like that any more.

The river looked pretty nice as we got ready to leave. But the winter boating season has started and we have already started a list of things to do.


Sunday, November 17, 2013

Yes, the boat is still in the water


They just didn't have time to pull it out and put it in the shed. The docks are thinning out, however. Pretty soon, they will be removing the docks, too.

It was a beautiful day here in Connecticut so we decided to do a little more work on our bow pulpit. If you've been following, we removed the anchor roller and little teak trip strips last weekend and it made sense to us, since the boat was still there and we could work on the pulpit, why not try to clean it up while we could still reach it?

There was lots of accumulated dirt under where the roller and the trim pieces had been fastened. We ran some 400 grit sandpaper over the pulpit and noticed that it was mostly just dirt. Then we squirted on some cleaner and scrubbed it with a brush. The results were okay. There was still some crap on the pulpit but we have to think that it will be covered with the anchor roller.

Before we started, we mounted our cam in its usual place on the bridge and unzipped the front window. The video that resulted (highly ended for length) is of almost no interest unless you know us, and even then, you might just nod off while watching it. But it was fun making it.

After that, we came home and did what most other property owners around here do at this time of year: raked leaves. We tried to make stop-motion video, but since Frances wasn't here to help, it wasn't the crazy Bill-runs-around the yard video that we had planned. More snore, but fun for us to watch when the snow is flying outside our kitchen window, as it soon will be.

On Sunday, we went to work on the teak trim strips that we had taken off the anchor pulpit. They were pretty well abused with lots of raised grain and embedded varnish and who knows what else.

We hit them with a belt sander and finished off doing the edges by hand. They will be fine once refinished.


The picture at the beginning of this chapter is of one of our vacuum bags.  We love these things because all of our towels, pillows and other stuff are vacuumed down into a half-dozen easily storeable containers. What would fill both of our v-berths, sucks down to six bricks that can live in the  bottom of a closet for the winter. Frances inserts a clothes dryer sheet into each one before compressing them.

The video is somewhat silly but, what the hell, it's just boating, off season. That makes us all a little crazy.

In the coming weeks, we'll get back to real boating.


Saturday, November 9, 2013

Last weekend in the water


Portland Riverside Marina is just about full. There were six boats scheduled to come up the river for storage this weekend and we saw at least two or three arrive. We were busy taking the last of our stuff off the boat when this sailboat pulled in.

The Captain of the sailboat said they had run aground just south of the boatyard. "The depth just went to two feet in no time."  Right. This must be his first winter here. The river does that to you if you aren't watching the charts carefully.

It must have been cold coming up the river, judging from the way the were dressed.


We took more stuff off than we usually do because we want to make some "critical" repairs such as adding reading lights in the v-berth and fixing the leaky faucet in the galley. Both of these projects require access to space that is usually filled with stuff, so off it goes.

We will also replace the old Danforth anchor. It's marked 18 lbs. and that's way too small for a boat the size of ours, as we found out the last time we tried to anchor at Block Island.


 We bought a hinged plow anchor several years ago but it wouldn't fit in the existing anchor roller.


That's because plow anchors require a different roller. This particular anchor is a 35 lb. size and from what we've read, that should give us the holding power we need. Now we'll have to buy the right roller and while we're at it, refurbish the anchor pulpit. That's a good winter project.

The inside of the boat looks nothing like it does in the summer and that's okay for now. We'll unpack everything in the spring.


We just had to shoot a photo of this before we left on Saturday. This houseboat (or whatever you call it) is on a mooring not far from where we are docked. It is truly a cottage on the water. Someone built this thing and even added solar panels to the roof to recharge its batteries. It has a front porch and a cooker and what looks like a couple of kitchen cabinets. It might even have a head, but let's not even think about how that might work. Insurance and registration?  Probably not, but we have to admire the effort.


On Sunday morning, we began talking about the anchor roller and how we were going to get it off. Once the boat is up on jack stands, it will require quite a tall ladder to reach the underside of the pulpit. But why not take it off right now when we can stand next to it at the dock?

That's what we did. Luckily, the anchor shackle cooperated and we were able to remove the anchor from the rode. The anchor roller (it appeared to be original equipment) was bolted to the pulpit with 3 four-inch long stainless bolts and nuts. They put up a fight but did come off.

We also removed the six teak trim pieces that were screwed to the pulpit. It looks as though they also had never been taken off. We'll refinish them over the winter and while no one will ever notice how good they look once the are reinstalled, we'll know that things have been done right.

The pulpit now looks pretty bad. Most of that is just dirt and mold and it should clean up nicely.


Sunday, November 3, 2013

Winterizing the boat

Of course, it had to be a beautiful day, a perfect one for a fall cruise. But, we're here in Portland with lots of other boats and since we understand cold weather is coming, it's time to begin winterizing the engines and the boat plumbing.

The video is a little shaky. Our tiny camera really needs some support but here's what it looked like as we got ready to winterize the engine.


We bought all the stuff we'd need two weeks ago. Twelve gallons of pink antifreeze, three gallons of engine oil and two oil filters. Turned out the oil filters were the wrong ones. How did we possibly buy Fram PH-6 when we needed PH-8A?  How long have we been doing this? Luckily there was a NAPA close by so the right filters were easy to get. Guess we'll make a note of that in our boat log.

As you probably know, this is a sloppy process. We had a large quantity of puppy training pads in stock and we used them to sop up any oil that might be spilled. Our method is to crack the oil filter loose with a filter wrench and then slip a zip-lock bag around it. The filter and all the oil in the lines are caught by the zip-lock bag. The filter drops into the bag, we zip the bag up and we are ready to go.


The photo shows our remote oil filter assembly. We learned long ago that the engine mounted filters were much too difficult to change without spilling lots of oil into bilge, so we installed these. The remote filter assemblies were inexpensive but the oil lines that we had made at a local shop were not. But, that oil going through the filters is pretty important so spending a little for really high quality hoses is really worth it.

We pre-filled the new oil filters by sticking a funnel in the bottom and pouring in new motor oil. It takes a while to really fill the filters but once filled, it's easy to screw the new filter in. We like the Fram filters because they have a rough coating applied to the bottom that makes them easy to grip when oily. We also wear elastic gloves and when this process is complete, we will have gone though at least two pairs.

Then it was time to pump the oil out of the engine oil pans.  We now use a vacuum pump and after going through three or four electric oil change pumps that stopped working after one or two seasons, we began using this one. We had warmed the engines oil by running each engine for about 30 minutes before we got started.


The directions for this pump say to pump the handle 16 times. (The tube from the pump is pushed down though the dip-stick tube.) Sixteen pumps gets us about a quart but when we recharge by pumping 16X a few more times, we get 4-1/2 quarts from each engine. Each ring on the pump appears to be a quart. This is our third season with this Marpac Fluid Extractor pump and unlike other more expensive electric pumps, it continues to work just fine.  Two guys at the boat yard stopped us and asked us about the pump. It can be bought at Defender Marine for less than $60.00.

After that, we poured a gallon of Rotella 10-W30 oil into each engine and then started each one to check the oil level.  The oil lines to the remote filters also have to be filled, so neither engine showed "full."  We added some oil to fill the remote filter lines and the oil change part was complete.

Next we began the process of filling the engine cooling systems with antifreeze. We've found over the years that we feel comfortable with three gallons in each engine. We have fresh water cooled engines so the pink antifreeze is only protecting part of the heat exchangers and the exhaust elbows. It doesn't take much before we see pink coming out of the exhausts.

Our method of adding the pink antifreeze isn't very elegant although it always works. We use a big old five gallon bucket on which we mounted a fitting, a shut-off and a length of hose.  Don't laugh. We're cheap New Englanders.


Then hose from the bucket is connected to a "T" fitting on the seawater intakes for the engine. Sure, it drips a little but it only takes two or three minutes before the seawater pump on the engine has sucked the bucket almost dry.


Did we "fog" the engines? This year, we didn't, only because we didn't have any Marvel Mystery oil on hand and we we don't like pouring motor oil down the carbs. We think the engines will be okay for the next six months without fogging.

After finishing the engine winterizing, it was time to do the boat's fresh water system. We have 45+ gallon water tank that was almost full. (Shouldn't have been, but that's another story.)

We opened the faucets in the head and galley (both hot and cold) and let them run to empty the tank. It's amazing how long that much water takes to run out.  Once the pump started to spit air, we shut the faucets and added six gallons of the same antifreeze to the water tank. Then we opened the hot water faucets and waited until we saw red antifreeze coming out in the sinks. Notice we said hot water faucets. We don't disconnect and drain our hot water heater separately. We simply run antifreeze though it very thoroughly. Once we saw pink from the hot water side, we did the same thing for the cold water lines.

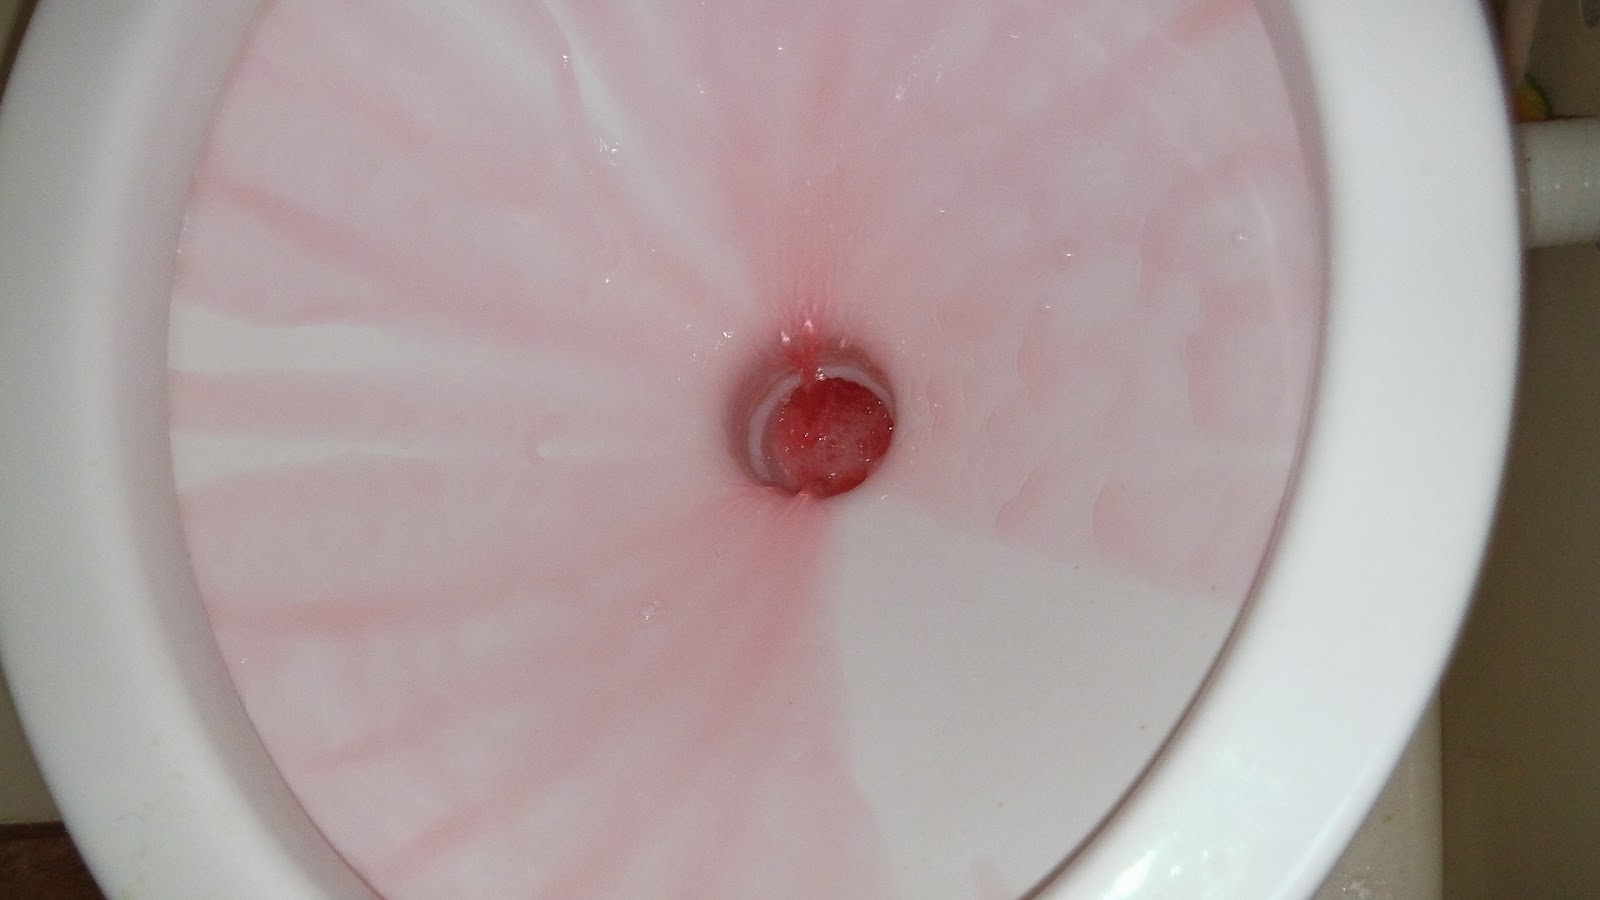
It's really great to see pink stuff coming out of those faucets and the head.


 Bet this is the only blog that will show you a marine head at mid-flush!

To finish up, we opened the deck hose that Frances uses to wash off the deck and water her flowers. We also poured antifreeze down into the shower sump until the pump came on and opened a "T" at the air conditioning cooling pump line that is much like the ones on our engines. The AC pump isn't self priming so it takes a while to get it to suck, but it eventually goes. We run a full gallon of antifreeze through it although that may be much more than we need.

Pink antifreeze is now everywhere and it's time to complete unloading the boat, which we at least started on Sunday. Never realized how much stuff we have on this boat!

Yeah, we know. We say this every year.