Sunday, April 29, 2012

If it wasn't for the weather...

...we'd be in Norwich, tied up to the dock. Over the last week, the weather deteriorated to the point that it got cold and pretty windy in Long Island Sound. We decided to stay put and make the run to Norwich next weekend. Before we head out, we normally visit our summer marina and put out the fenders and dock lines that we'll need when we finally get there. It was fun to take a little road trip and visit Norwich today.

Our friends John T, Bob, and Louie and Janey were on the dock as a welcoming committee. Nice to see them all again.


Unfortunately, a former dock mate didn't return this year, so we moved up one slip. This summer, we get to look at the other side of Lou and Janey's beautiful Four Winns. We put out our fenders and electric cable.  All we have to do now is make the 50 mile trip to Norwich.


Our boat is running fine - all fluids checked, cooling fluids full, new steering working and no leaks from the many new exhaust parts we renewed last winter. We're looking forward to starting our summer!

Sunday, April 22, 2012

Finally, some rain

This weekend we continued to clean up the boat and get ready to leave. It was nice to get back on the bridge and start the cleanup. If you've read earlier posts of the blog, you may remember that the helm on the bridge failed all by itself some time after the boat was put into the shed for the winter. "Failed" means that the seals stopped sealing and that let about a pint of hydraulic fluid drip down onto the floor. Over time, it slowly ran down across the floor and out under the side of the bridge itself. We got down on our knees and applied our favorite cleaner, "Magic Roll Off" and it allowed us to wipe up the hydraulic fluid up immediately. Good stuff.


 Today (Sunday) it finally rained, which turned the very dusty boatyard into a very muddy one. Despite that, we vacuumed the inside of the cabin, put all of our tools away and got things ship-shape. There is no electricity on the docks yet but we used our little Yamaha generator to power the vac and the battery charger, which showed both battery banks to be fully charged.

The weather is going to be pretty bad over the next few days but that won't last forever and soon we'll be out of here.


 There are no floating Aids to Navigation out yet on the upper Connecticut River and that can be a cause for concern if you don't know the river well or if you don't pay close attention to your chart plotter. On Saturday, a 52 ft. sportfisherman left Yankee Boat Yard (next door to Portland Riverside, where we are) and drove over Mouse Island Bar. Luckily, he wasn't going too fast and only took out the props and shafts. We've pointed a little red arrow at the rocks on the bar in this chart. Red "86" normally keeps you off the rocks but not at this time of year.


The rocks are just below the surface and they are well known to just about everyone who boats in the upper river. Well, almost everyone. At about 3 PM on Saturday, a 48 ft. SeaRay left Portland Riverside and guess what?  He also hit Mouse Island and did some serious damage to his props and shafts. They towed him back in.


That's the boat and unfortunately, it's going to be around Portland Riverside for a lot longer than the owner thought.

Thursday, April 19, 2012

April 19: In the water!

This must be the earliest we have ever had a boat put in the water. I think the folks at Portland Riverside cut us some slack this year considering how late we got in last year.

We learned on Monday that Act Three would go into the water on Wednesday, April 18. We always like to be there when they launch our boat so we showed up on Wednesday only to learn that there had been a problem with moving boats around and we wouldn't get in until today. Knowing that and the "flexible" schedule that Portland Riverside usually has, we didn't show up today until about 1:00 PM.  When we did, the first thing we saw was our boat being towed out of the shed. Once out, the guys posed for a picture.


Since the TravelLift won't 't fit in the shed, they have to use a hydraulic trailer to get the boat outside.  Then, they position the lift over the boat and slowly pick it up.


Then they drive the trailer out from under the boat and it's off to the river on the TravelLife slings.


Once in the water, the crew tows the boat to an open slip. The outboard on the tow boat was acting up for some reason but they got us into a slip without a problem. These guys have probably done this a thousand times.


Once tied up, we decided to start the engines. We had brought a small amount of gas with us to prime the new carbs and fuel lines. It took a couple of tablespoons of gas, but they both fired right up. But, nothing goes right the first time. The fittings that adapt 5/8" ID fuel hose to carb inlets leaked gas on both engines. We shut them down and will now have to find better fittings. Why should connecting common 5/8" fuel line to a new carb be so difficult?

Anyway, we are in the water and as soon as we get this latest problem under control, we're saying good bye to Portland.

Saturday, April 14, 2012

Time to touch up the bottom paint

We always leave the bottom until last because it is such a delightful job. Actually, it's not that bad. Two winters ago, we stripped all the old bottom paint off the boat (almost 100 lbs. of it) and applied a bright green barrier coat. Over that we put on a coat of black ablative bottom paint. Wherever the black bottom paint has worn off, the green shows through. Pretty neat. Our bottom doesn't need much paint but there are some spots.


We did about half the bottom before we quit on Saturday. It will take us an hour or so to finish it up.

Our new anchor has given us a small issue. We didn't have an anchor shackle quite big enough to connect the anchor to the section of chain rode. We got one during the week but the pin (which is supposed to be 5/8") is just a little too big to fit through the anchor shaft. The anchor shaft is cast and it looks like we'll have to clean up the hole by running a 5/8" drill through it a couple of times.


Today we moved up the date that the boat will go into the water from May 23 to May 19. Knowing the precision scheduling at Portland Riverside, there isn't much chance that the boat actually will go into the water on that date but it just might make it a few day earlier than we originally thought.

Given the mild winter and lack of rain, the Connecticut River is as docile as we've ever seen it at this time of year so if we do get in the water, it should be a pleasant cruise down the river. Before we go, we'd better remind the yard to remount our starboard prop. Kinda forgot that we had that taken off to repair the little dent we put in one blade. 


It will be good to get the hell out of here. We took a few weekends off over the winter but we spent the rest of them working on the boat. Looking back over the past blog entries, it's gratifying to see how much we accomplished and to us, it was time well spent. But as much as we enjoy boat work, we're getting tired of it.  Once we get to our summer slip, our lives change completely, Instead of freezing our butts off and crossing off one more thing on our "to do" list, we can relax and enjoy ourselves, our slip neighbors and being on the water.

New anchor won't fit
On Sunday, we drilled out the mounting hole in the shank of the new plow anchor, fastened the shackles and chain and pulled everything up with the windlass. The shackle on the new anchor was too wide to fit in the hinged guide that is supposed to hold the anchor in place.


Time to give up on this project.  We attached the old anchor to the new line and pulled the anchor up in place with the windlass. Our original goal was to replace the 32 year old anchor line and we did that. Now we have all summer to figure out how to accommodate the new anchor and still have the windlass stow it properly.

Realizing that this may be our last weekend to get things ready, we finished spot painting the black ablative bottom paint and cleaned the scum off the boot top. Then we began disconnecting the many extension cords and lights that we needed during the winter and packed things away in the car.

Then we put out dock lines all around so that if the guys do put the boat in the water without telling us first, everything they need is ready. The boat is very dirty but we'll get a chance to hose it off, once we are in the water.


Before we left the boatyard, we took a look at the river on this beautiful spring afternoon.


It appeared to be low tide (there's a little more than two feet of tide even this far from the Sound) and the water level was really low.  This is going to make it difficult to launch larger sailboats but a powerboat our size can go in even when the well looks like this.


Boats are launched bow out and we don't start our engines until we have been towed to a slip. That's not the case with the larger powerboats. There are probably half a dozen boats 48 feet or more in length to be launched and because they are too big for the existing slips, they have no place to go once they are in the water.  We've seen owners jump on their boat as soon as it's floating, start the diesels and let them run for half an hour and then take off. Many, however, putter around on their boats for two or three days and when that happens, boat launching stops.

We're scheduled for Thursday, April 19 but if this is like past years, we'll have at least one more weekend to wait.


Saturday, April 7, 2012

Easter Weekend

We really don't have much left to do but we have left a couple of nasty things until last.

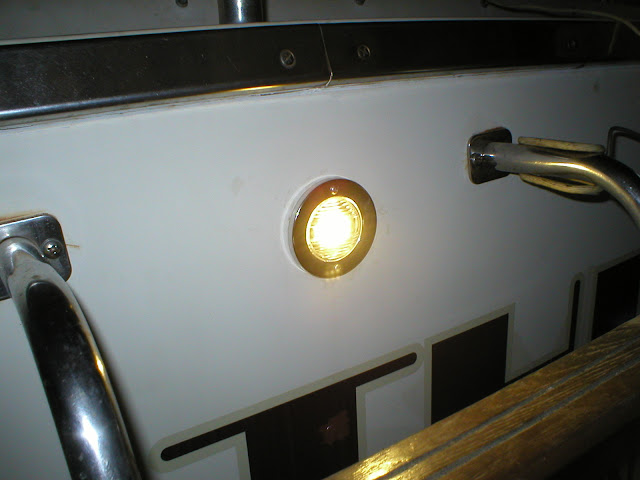
First an easy one. We installed the new stern light. It's made by Perko (just like the old one) and for the ridiculous price of almost $65.00 it came with an ordinary bulb. No LED? Well, it has one now. We took the LED bulb out of the old light and installed it in place of the festoon style bulb that Perko still supplies. We tested it with the supplied bulb and our LED and our LED is brighter.

Next comes the new anchor. The Danforth that came with the boat is woefully inadequate (as we found out one day last summer) so we set about to find the best anchor for our boat. Everywhere we looked on the internet, there was a different opinion. Even the anchor manufacturers differed. What style anchor? Even that was a confusing mix of opinions.  We finally determined that a plow anchor was a good tradeoff for a boat our size on sandy, muddy or grass bottoms. When searching for plow anchors, we came across a site on Ebay that had them. We asked a question on that site. What size plow anchor should we buy? That started an exchange between us and the seller who was a SeaTow captain in Florida. He recommended a 35 lb. hinged plow anchor and, as it turned out, he didn't have one to sell us but he suggested buying one at Defender Marine in Waterford. We like Defender but we found a better price (including shipping) at BoatFix in New Hampshire.

After we found the anchor, we bought 200 feet of 5/8-inch anchor line.

To get this process started, we lowered the anchor using our windlass and took off the old Danforth. It took a little persuasion, but the old shackles unscrewed. Tomorrow, we'll install the new anchor and reel that new line up into the anchor locker.


Finally, it was time to repair the passive engine vents on the port side of the boat (we did the starboard side last winter). We've put this off because the boat next to us is so close but we found an unused stepladder and went up to take a look. The PO had re-fastened the vents with steel bolts and we had to drill those out. Why do people who own boats repair anything with ordinary steel hardware?


Behind the vents, there are plastic collector boxes that connect to the vent hoses. Silverton's method of fastening that all together was to our put metal clips on the edges of the collector boxes and then run screws though the outside vents and then though the metal clips. After 32 years, the metal clips were gone. Once we removed the outside vents, the collector boxes were just hanging there, held only by the hoses..

Thanks to a member of the Silverton Owner's Club who had a good solution. We drilled new holes at the top and bottom of the hull opening , deeply countersunk them and ran two stainless flathead screws though the hull and into newly cut holes on the collector boxes.  This holds them tight against the inside of the hull.


Then we only had to mount the plastic vents that cover these openings. We had one new one and we reused one of the old ones. The old one has some minor rust stains (from those stinking steel bolts) on it but it will do for now.


While nobody else probably cares, we found the passive ventilation system on this vintage Silverton somewhat interesting. On the starboard side of the hull, the louvers face forward so air is forced into the boat as it moves through the water. There are two louvers on each side and behind each one is one of those collector boxes with two 3-inch flexible hoses attached to it. Those four hoses run between the hull and the cabin liner back into the engine space. The port side has the same arrangement except that the louvers face backwards, which draws air out of the engine space while the boat moves. One exception on the port side is that one of the four hoses has the bilge blower mounted in it. Anyway, it's nice to know that this ventilation system is once again working the way it should.

On Sunday, we began by pulling all of old anchor line up out of the anchor line locker in the v-berth and up through the windlass. It was fairly ratty looking but someone at Portland Riverside will grab it, I'm sure.


Note the red marking on the old line. We decided to mark the new line the same way but changed the distance between the markings to something made made more sense to us. We used Rustoleum spray paint in the same colors as the old line had. With 35 feet of anchor line out, we'll see five feet of red marked line; with 75 feet out, there will be 5 feet of blue marked line; with 115 feet of line out, there will be five feet of orange. Then at 155 feet the color will be green and at 195 feet, we go back to red again.

We unrolled all 200 feet of line in the boatyard driveway, measured and painted the five foot sections lightly. No need to soak this line with paint. The color is easy enough to see. Then we set up the line so that the windlass would pull it in without snagging on something.


We couldn't reach high enough to put the bitter end of the new line in the roller on the pulpit but we climbed up (carefully) on a little go-fast boat that is parked in front of us and was just able to reach. We went up on deck and stuffed the bitter end into the windlass and headed to the fly bridge and hit the switch.


The windlass grabbed the line and we sent about 10 feet down to the anchor locker where we tied a huge knot on the end. Then we let the windlass pull in all but about 15 feet of the new line. The line stowed neatly and we're glad we followed the directions regarding how to initially remove it from the spool.


Don't you just love our furry walls? Someday we're going to peel that crap off and start over. The opening to the anchor line storage area is normally covered by a mirror.


We were going to attach our new 35 lb. hinged plow anchor but the shackles we harvested from our little Danforth anchor were too small so this week, we'll go on hunt for some much bigger shackles. We hope that's the last thing we'll have to buy for the boat until it gets in the water.

Saturday, March 31, 2012

AC Water Pump Gets a "T"

Winterizing the AC is always difficult because the hose between the sea cock and the cooling water pump is difficult to remove. "Difficult" is being kind. Once the hose is finally pried off of the sea cock, it's necessary to pour antifreeze into the end of the hose using a small funnel while someone else cycles the air conditioner on and off. I know we could always blow compressed air through the system to push out the water but dragging our compressed air tank down to the boat always seems like even more work. Besides, it's reassuring to see antifreeze squirting out that fitting on the side of the boat.

The list of things to be done this winter is growing short so today we too the opportunity to remove the stiff old hose from the sea cock to the AC pump and install a "T," which will allow us to winterize the system much more easily.  We have a T on each of the engine sea water intakes and winterizing the engines just takes a few minutes.

Instead of just replacing the old 3/4" ID hose, we were able to shorten that line considerably by adding two elbows.  Make a much neater installation, as well.


Here's a closer shot of the new T fitting.


While we were doing this plumbing and with the old hose out, we were able to stick our head down next to the pump and look aft, under the salon floor.  There's space there that goes back perhaps seven feet. Don't know why we even bothered to look into this space but when we did, we saw two long pieces of 1" hose just laying there, much too far back for us to reach.  They weren't connected to anything.  They had to go.

We straightened out a coat hanger and were just able to hook the hoses and pull them forward until we could grab them. They turned out to be deteriorated red 1" hose of the type that Silverton used in other parts of the boat (and which now have been mostly replaced).


Between the two pieces, there were perhaps 25 feet of hose and neither piece showed the impressions that hose clamps would have left on the ends. Our guess is that these two sections of hose were left there when the boat was being built. It would have been almost impossible for the previous owner to have stuffed them that far back under the floor, but they could have easily been left there before the salon floor was added.  It wasn't even good quality hose, which makes us even more suspicious that the guys in Millville left it there more than 32 years ago.

As we said, our list is growing short and we're on the list to go in the water during the week of April 23 so today was a good day to check the navigation lights.  The stern light has always been troublesome (sometimes needed a tap of the finger before it would go on) so we took that apart and found it, well, less than salvageable. We've ordered a new one and we'll install it next weekend.


 Shallow water. It's always something!
.Sunday, we had to spend most of the morning doing some house cleaning and of course, some quality time with The New York Times. The next thing on the boat list was to touch up the bottom paint but the curtains on the shed are still closed and it's too dark in there to see to paint accurately. Instead, we busied ourselves taking stuff off the boat, and there was quite a lot of it.

We checked in at the office to order our stern light (and hopefully get a better price than the outrageous $64.95 shown in the West Marine catalog) and were told that the "crew" was having difficulty putting the docks back in the water because runoff from the yard had built up to the point where at low tides, the shore-side of the docks were not floating but resting in the mud. Of course, we had to take a look before we left.

The area where the crew was working is carefully cordoned off for the safety of the public. Here's a typical Connecticut River mooring doing double duty.


A few dock sections are in. This is apparently as far as they got.


The process for putting these dock sections and the fingers that attach to them is really quite interesting. The sections are lifted by a crane using a fixture that fastens to holes in the side of each section.


For any gearheads who might be reading this, the crane is hydraulic and it's powered by a GM 6V53 diesel engine. This crane was purchased used about 12 years ago and that old Detroit engine is still going strong. We wish I could find a pair of those engines to put in our boat.

We shot a photo of one of the spiles and while it's difficult to see in the picture, the water between the spile and the rock embankment is only a few inches deep, and this wasn't even at low tide.


 That means there is a problem. Without most of these docks they will be unable to launch boats quickly. Will that affect our launch date? God, we hope not.


Saturday, March 24, 2012

The first weekend of Spring

This week we devoted some time to the production of Portland Riverside Marina's sales flyer. We do this every year for the marina where we winter store and this year it was getting late. Frances felt this project needed some help, so last weekend she went to the marina store and started to pack up products that needed to be photographed.  During the week, we set up the "Act Three Photo Studio" on the same workbench where we do everything boat-related and shot pictures of about 30 products. It's nice to be running one's own business so you can make time for stuff like this.  Once printed, the brochure will be six pages, all color. It really helps the marina draw people in to buy stuff at prices that are often far cheaper than the boat stores charge. This will the the 8th year we have produced this brochure for them.


Once the photos have been taken, we open them in PhotoShop and enhance the color and take out the backgrounds. That's the reason you see the green background behind the cans of solvent.

But, back to our boat. Today (Saturday) we re-erected the bridge enclosure. As we described previously, we waterproofed the top piece and today we installed it. It went up OK, but what a pain in the butt! We don't look forward to doing this again any time soon.

Then we began adding the side pieces of the enclosure. The exercise keeps us young. First, climb down the ladder and go out to the car. Select the right section of the enclosure. It only goes up one way because of the zippers on the sides so you need exactly the right section. Once the the right piece is found (there are 12), bring the selected section back to the boat, climb up the ladder to the boat and then climb up onto the bridge and snap the piece in place on the top and bottom and fasten the zipper. After the first two sections were up, we took a picture. We wish we could see water out there instead of the boat shed.


An hour or so later, the bridge enclosure was up. We have found that a small dot of Lithium grease on the fittings makes them snap together easier.


There were other things on the list for today but we decided to mask and paint the wire raceway that we had to put in when we installed the new light in the cockpit. The fact that the raceway was white and the mounting surface was beige just wouldn't do.

First we noticed that some mold had grown in that area. Not a lot but enough to see. We wiped everything down with a solution of bleach and water and the mold stains were gone. Then we masked and painted. Looks better, wouldn't you agree? (Like you'd really notice!)


By then it was only 3 PM but we left the boat to go play with a new toy (we mean new tool).

On the way down this morning, we visited Harbor Freight and bought an inexpensive ($129.99 on sale for $99.99) pressure washer. Our intent was to use this washer to clean out our bilge but since there is still no water at the boat yard, that would have to wait. Instead, we went home to assemble this new tool and see how it worked. You can't expect much for $100 but at least on first try, it worked okay. We blew the mold  and loose paint off the our deck.  Can't wait to stick that thing in our bilge!

Sunday: Shower sump surgery
In a blog post last winter, we described the installation of a new holding tank and a new shower sump. The old shower sump was carefully located by Silverton so that couldn't be reached even with arms twice as long as ours so we had to pull up the carper and cut a hole in the floor. In went a brand new Rule shower sump. We poured some water down the shower drain to test it and the sump worked fine. Off we went for a carefree summer on the boat.

But not quite. Just after the boat was back in the water, we got aboard and noticed that the shower pump was on and apparently had been for some time. No one had used the shower and in fact, there wasn't even any water on the boat. We were unable to stop the pump so we disconnected it. We never use the shower anyway but it is nice to know it will work if we ever decide to. Last fall, we checked with Defender Marine, where we had purchased the sump, and were told that the warranty had run out. We're there serviceable parts inside, we asked? No one really knew but the consensus was no. So we plunked down one boat unit ($100) for another shower sump.

Today, we again pulled up the carpet and our little access hatch and reconnected the power to the sump. The pump came on immediately and no amount of tapping on the float switch would shut it off.  Here's this P.O.S. with a little antifreeze in the bottom. The pump worked fine even after running dry for who knows how long.


This thing is really just a plastic tub with an 800 GPH Rule bilge pump and a "Rule-A-Matic" 20-amp. float switch. How about Junk-A-Matic as an alternative name? We elected to replace just the float switch because replacing the entire sump would have involved fighting the hoses and the mounting screws and would have an hour or more..

Once we had the old switch out and the new one in, the shower sump worked fine. It will be interesting to see how long this one lasts.


We tested the old switch and it was shorted to an always-on condition. Luckily, we don't use Rule bilge pumps or switches for our main bilge pumps.

While we were taking that picture, our friend Rob, who has a Luhrs 34X right next to us, mentioned that he had a Rule switches like ours fail on one of his bilge pumps after just a couple of seasons. Guess we'll cross Rule off our list permanently.